- View all configured card products (virtual and physical) and relevant information.
- Order cards from existing card products (either single or in bulk).
- View the results of bulk card ordering file uploads.
The basics
To manage card products, log into the Marqeta Dashboard, select Dashboard in the upper-left corner, then select Card Management > Card products in the sidebar. For more on accessing the Marqeta Dashboard, see Accessing the Marqeta Dashboard.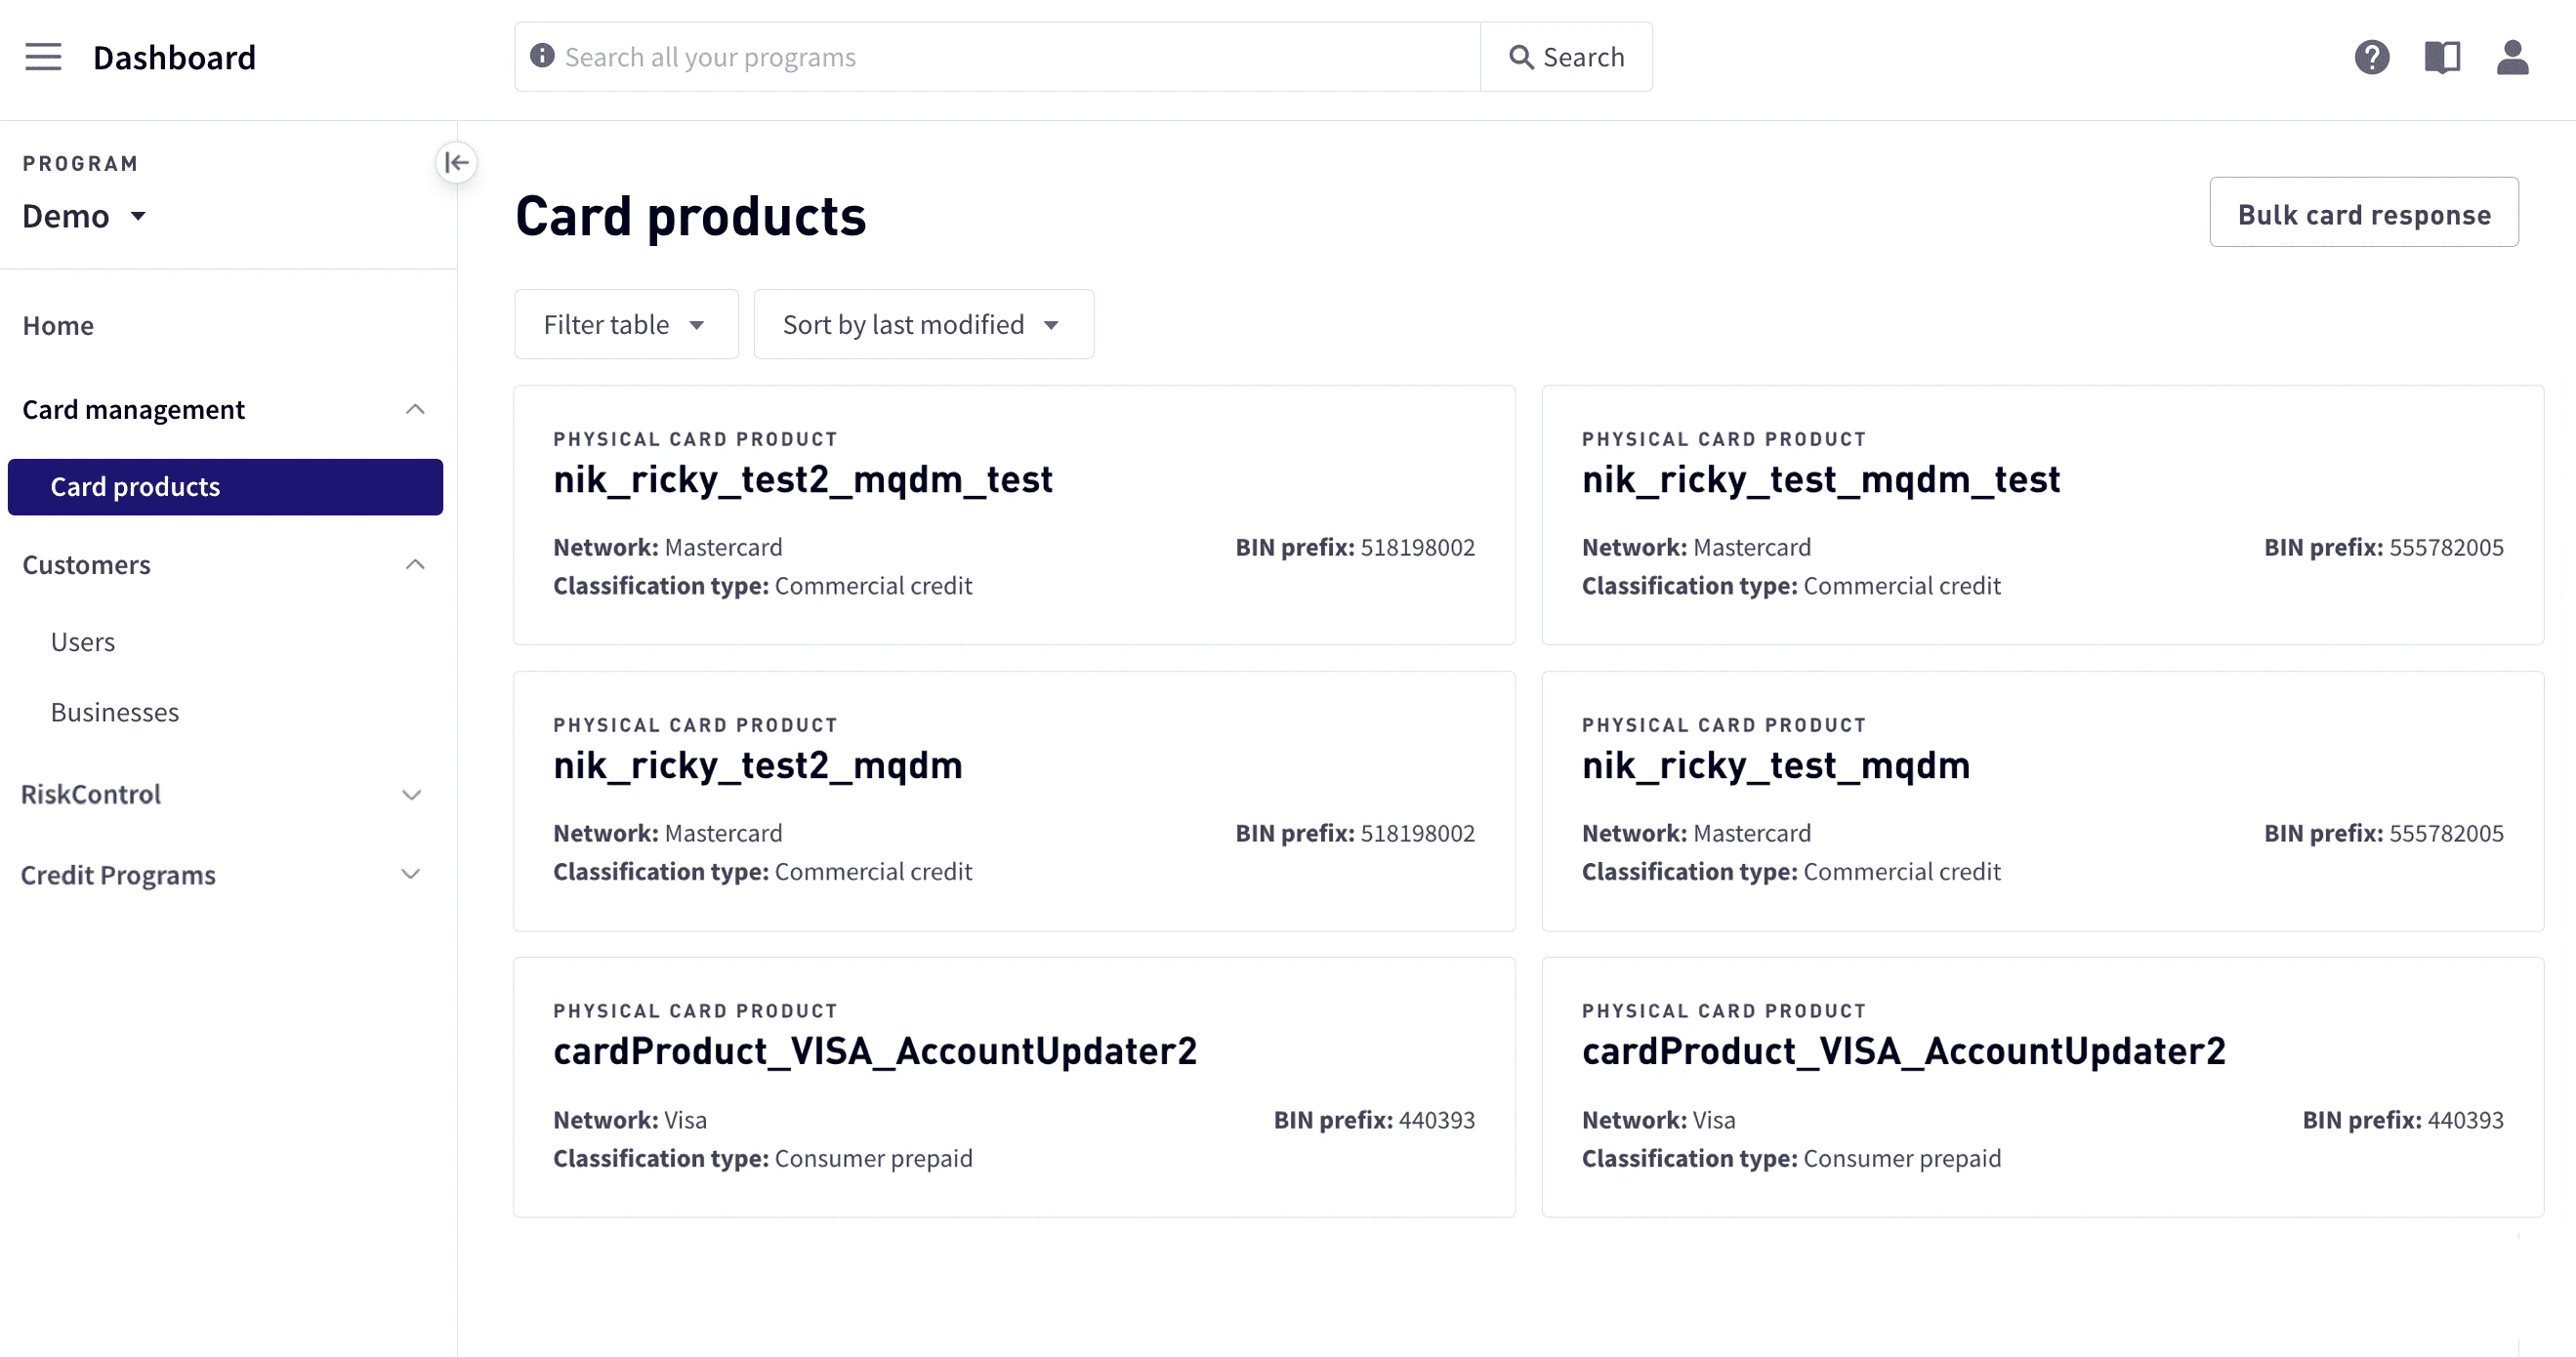
How to…
Viewing a list of card products
To view a list of card products, go to Dashboard > Card management > Card products. The current card products are displayed with summary information, including the network, classification type, and BIN prefix.Viewing card product details
To view a list of card products:Select Dashboard in the upper-left corner, then select Card Management > Card products in the sidebar.
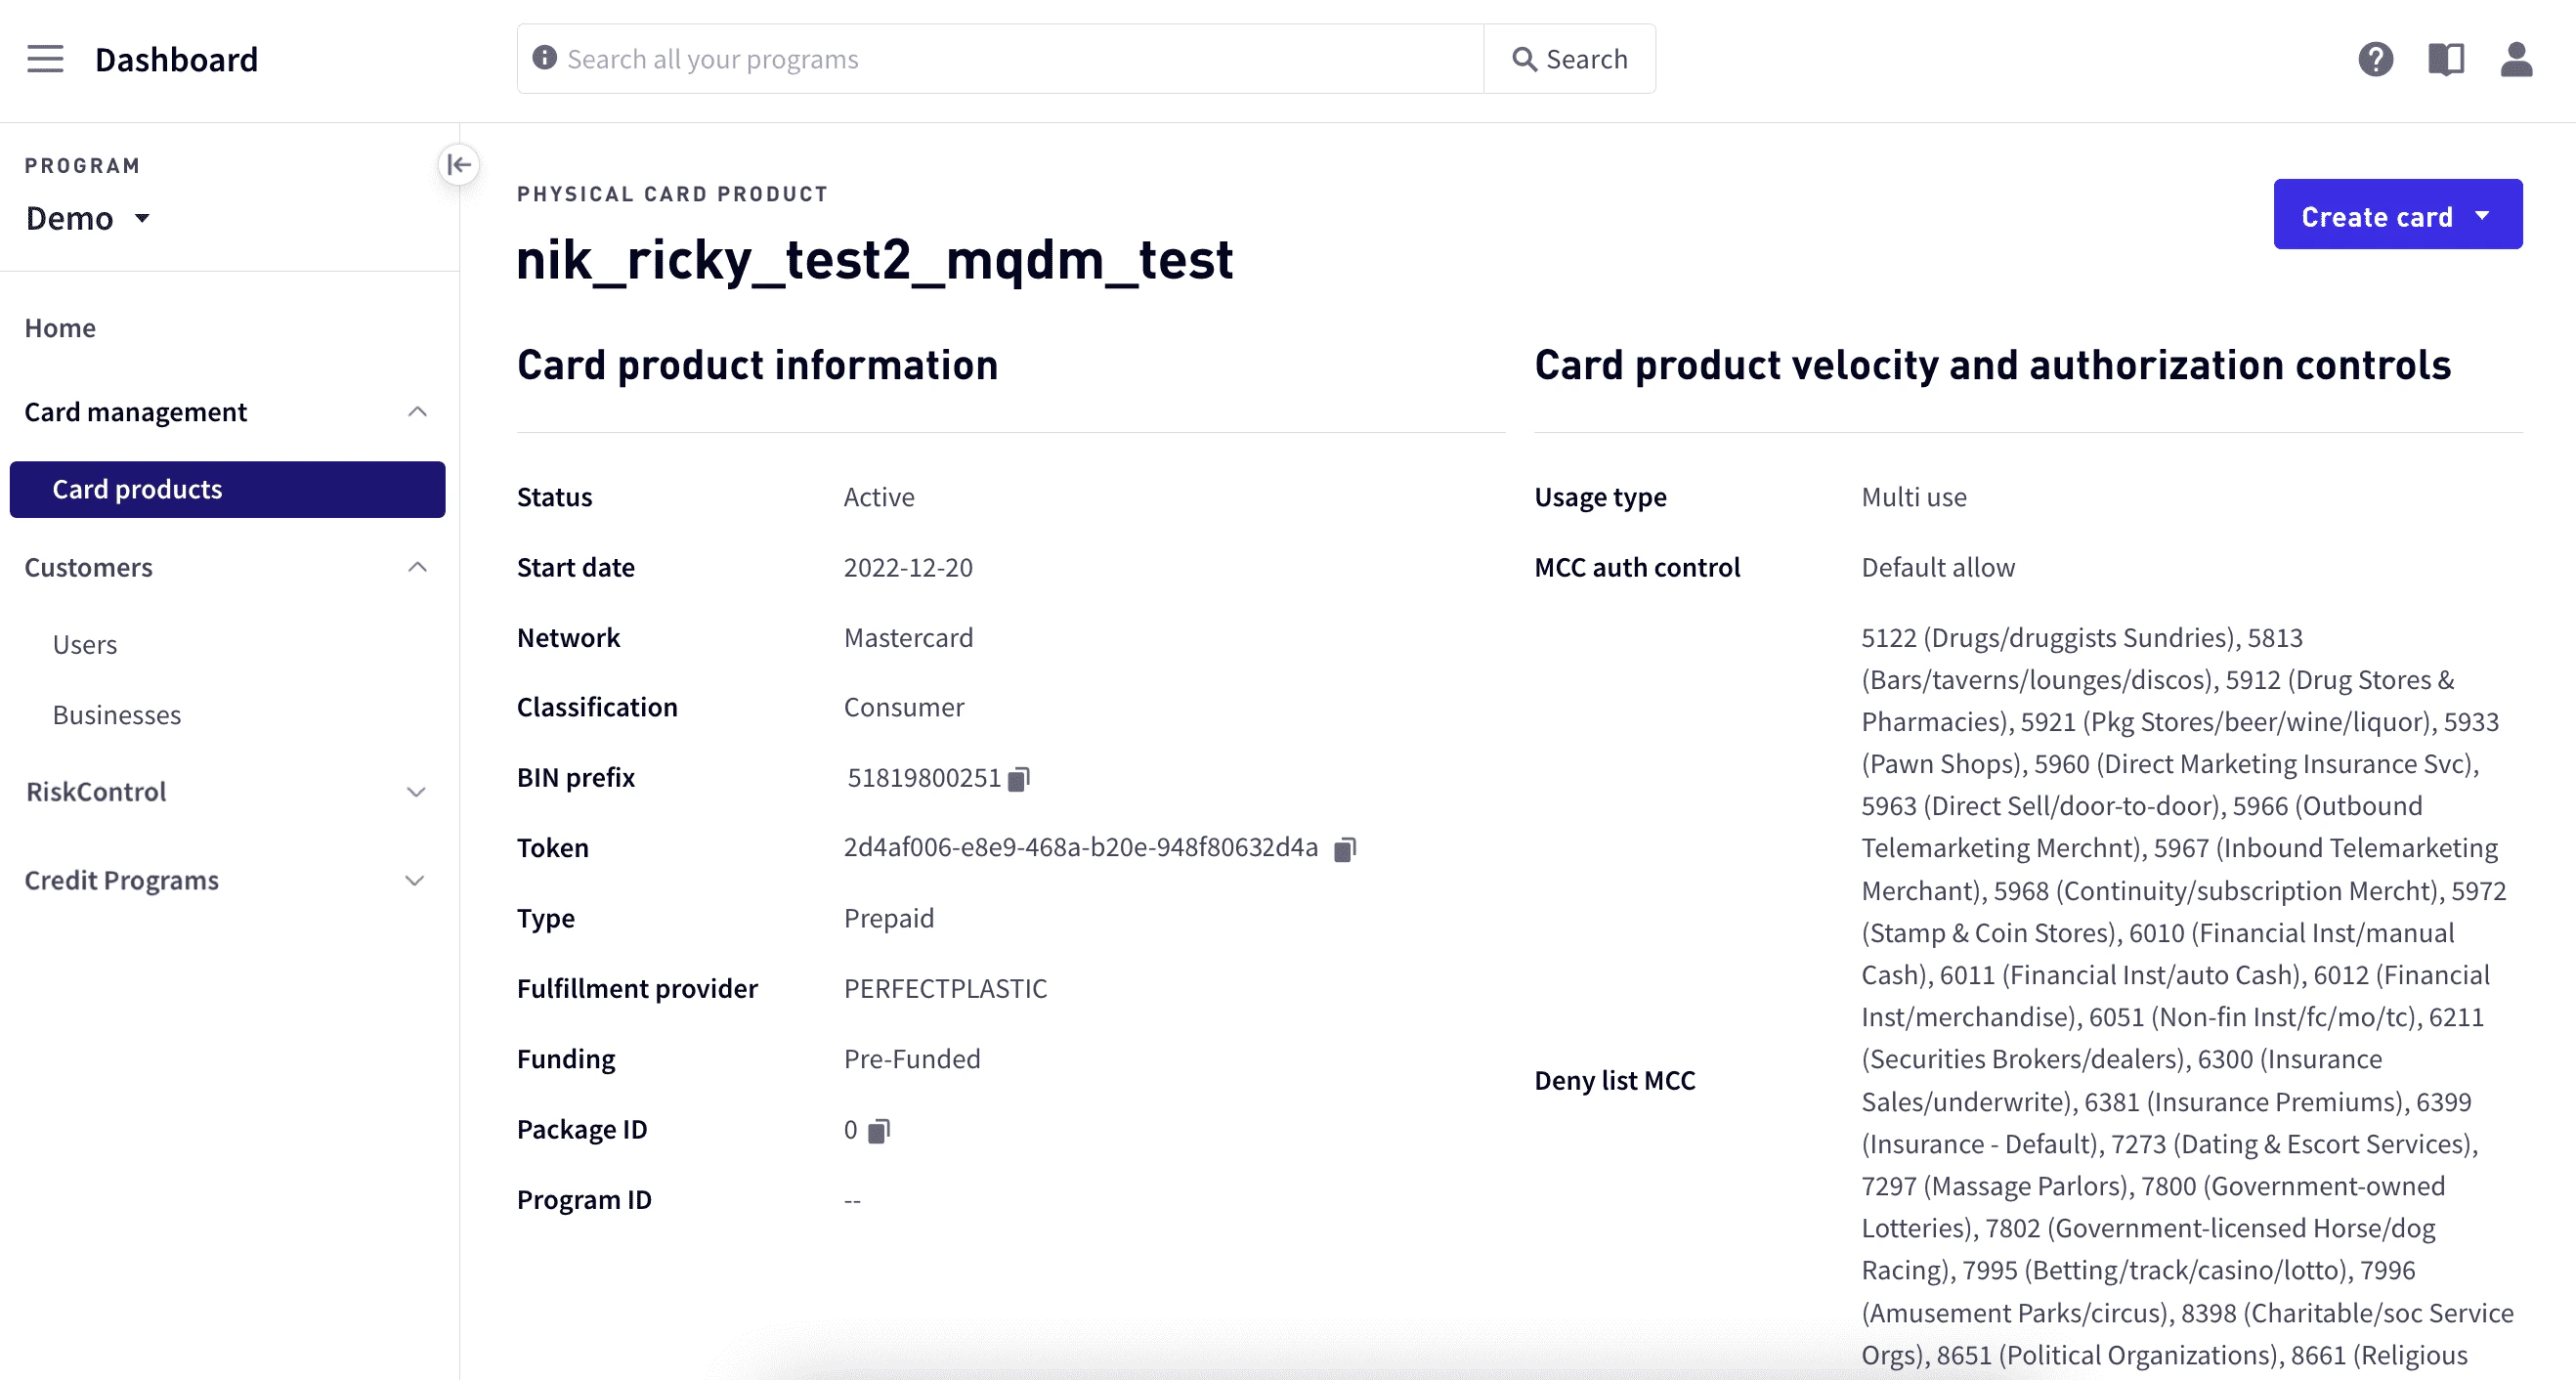
Card product information
| Field | Description |
|---|---|
| Start Date | The start date of the card product. |
| Network | The network associated with the card product. |
| Classification | The classification of the card product: consumer or commercial. |
| BIN Prefix | The prefix of the bank identification number (BIN). |
| Token | The card product identifier. |
| Type | The type of card product: debit, credit, or prepaid. |
| Fulfillment Provider | The fulfillment provider: PERFECTPLASTIC, ARROWEYE, or IDEMIA |
| Funding | The type of funding, such as prefunded. |
| Package ID | The identifier for the package. |
| Program ID | The identifier for the program. |
Card product velocity and authorization controls
| Field | Description |
|---|---|
| Usage type | How the card is used: Multi-use or single-use. |
| MCC auth control | Controls the expiration of authorizations and automatic increases to the authorization amount. |
| Deny list MCC | Merchant category codes for merchant types added to the deny list. |
| Velocity control | Velocity controls applied to the card. |
Creating a card
You can manually create a card or create cards in bulk by uploading a file that contains the information about the cards to create. When you create a card, a card is created from a card product. When you manually create a card, you will create a single card and will need to enter the details. For bulk card creation, the details are entered into a file that can be uploaded to create multiple cards from the card program.Manually creating a card
When you manually create a card, a new card is issued from the currently selected card product. To manually create a card:Select Dashboard in the upper-left corner, select Card management > Card products, and then select a card product.
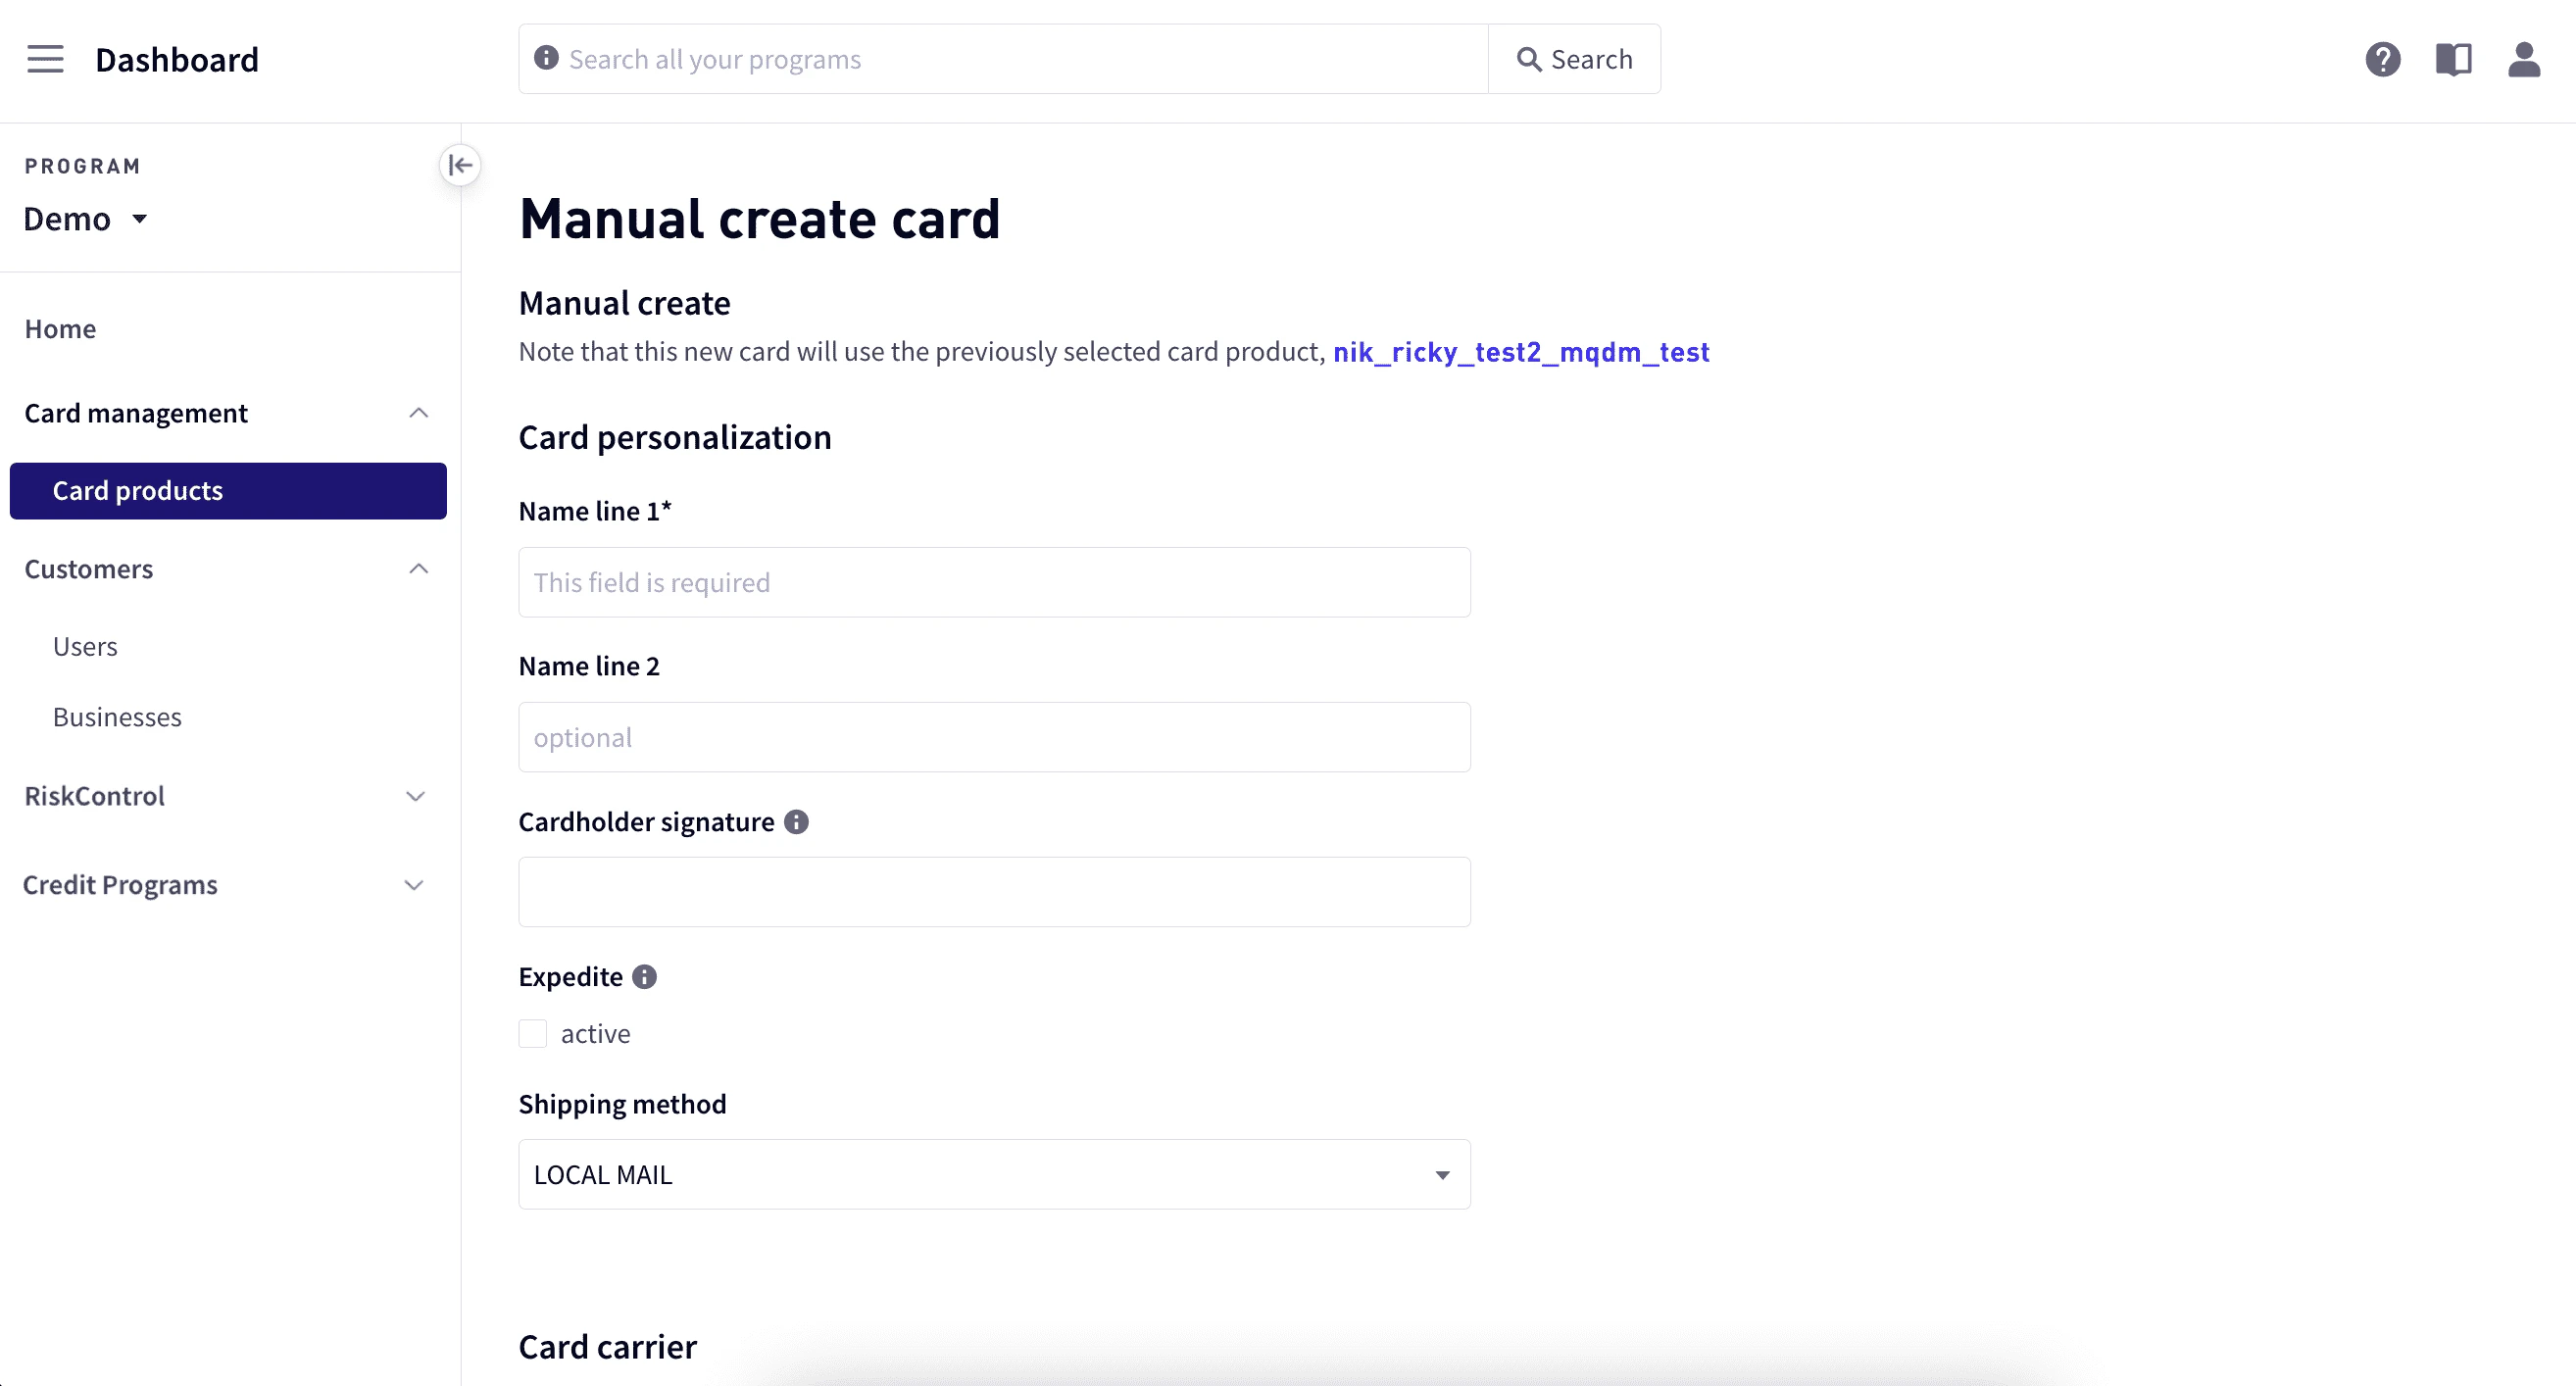
In Manual create card, enter the details for the card.
| Name line 1 | Name for card personalization. |
|---|---|
| Name line 2 | Additional name information, if necessary. |
| Cardholder signature | A PNG image of the cardholder’s signature. |
| Expedite | Indicated whether to expedite the manufacturing time at the provider’s site. Shipping will not be expedited. |
| Shipping method | The card shipping method: LOCAL MAIL, TWO DAY, OVERNIGHT, or INTERNATIONAL |
| Card carrier | Select + Add card carrier to open the popup window. Enter the logo file name, a message line, and for Carrier return window, specify a PNG image to display in the return address window of envelopes used to send cards to cardholders. Select Add card carrier. |
| Return address | Select + Add address to open the popup window. Enter the address information, and select Add address. |
| Shipping address | Name and address where card is to be shipped. |
| Card user name | First and last name of the card user. |
| Deny list MCCs | Merchant category codes (MCCs) to deny. To add additional MCCs, select + More MCCs. |
| Usage type | How the card is to be used: Multi-use or single-use. |
| Velocity control | Any amount and usage controls for a given time interval within the preconfigured controls. To add an additional control, select + Add velocity control and enter the control details. |
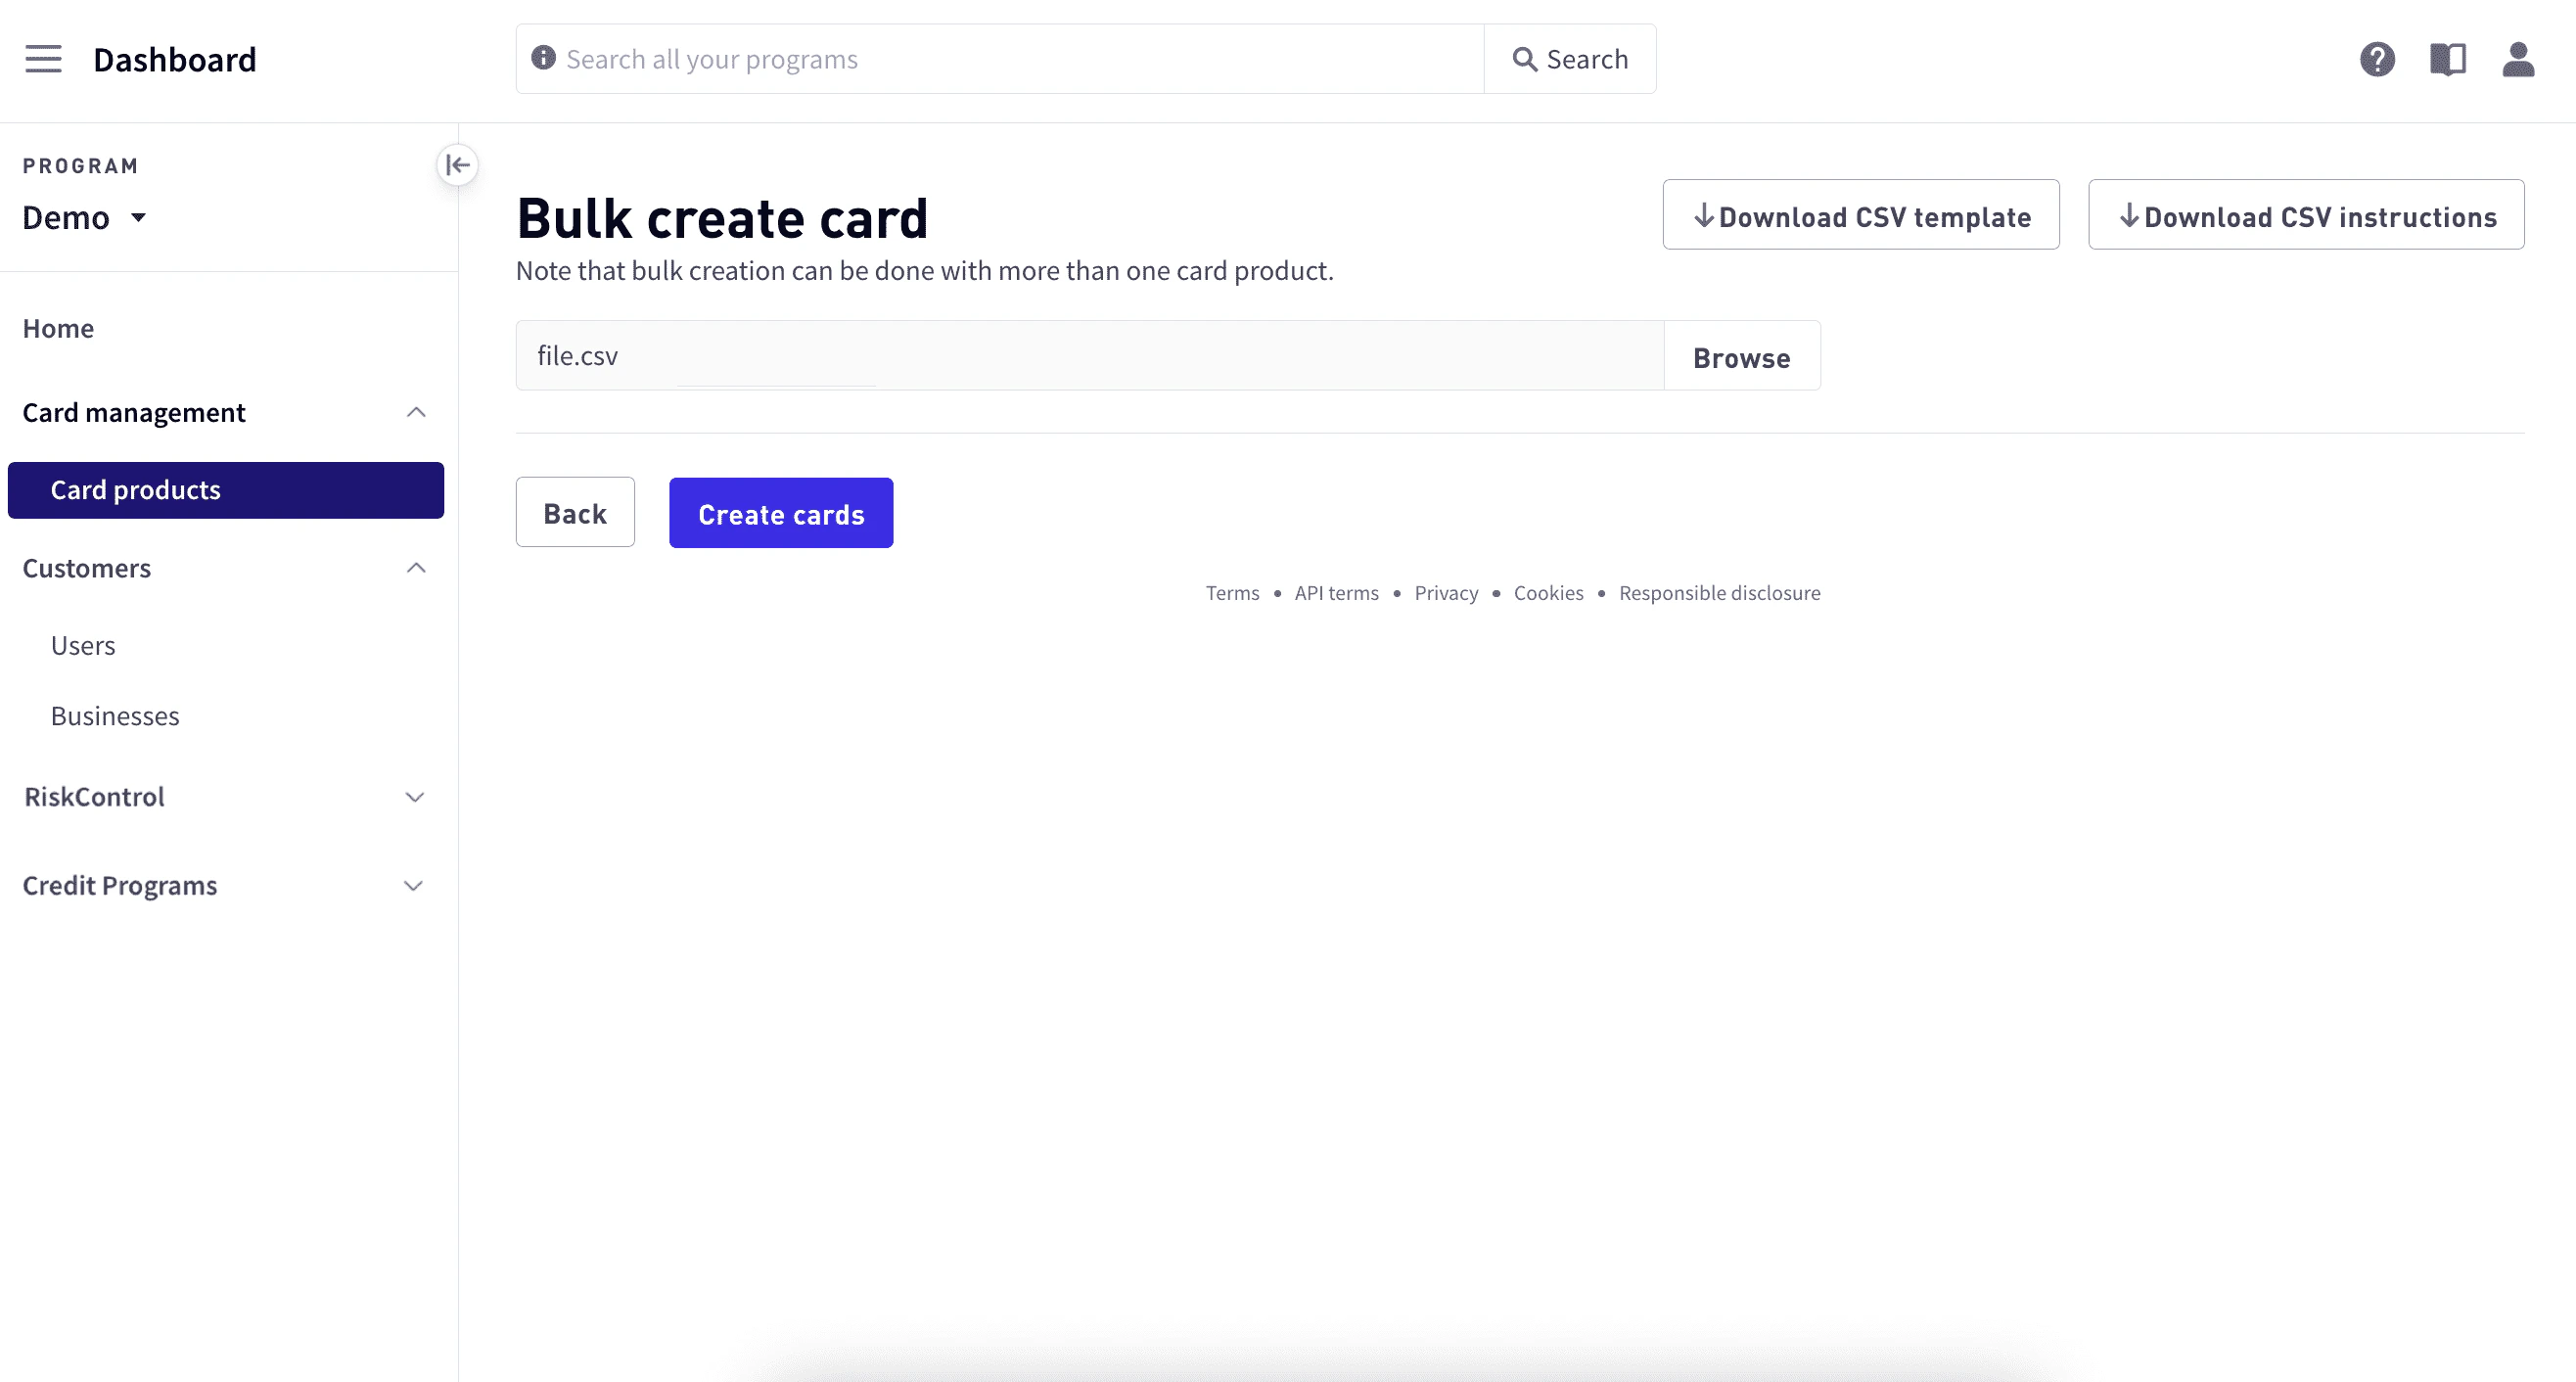
Creating cards in bulk
To create cards in bulk:- Download the template.
- Create the bulk upload file.
- Create the object rows.
- Upload the file.
- View the response report.
Download the template
To download the template:Select Dashboard in the upper-left corner, select Card management > Card products, and then select a card product.

Create the bulk upload file
Using the template, create and populate your upload file. The file must conform to the following requirements:| Requirement | Description |
|---|---|
| File format and size | The bulk upload file must be in .csv format and not exceed 10 MB in size. |
| Header row | The first row of the CSV file must begin with HEADERS, followed by a comma-separated list of the field names you want to include for each record in the file. For example:"HEADERS, ApplyToUser, UserToken, UserFirstName, UserLastName" |
| Comments row | The COMMENTS row of the CSV file is ignored—these descriptions are provided to help you populate the template. |
| Object rows | Each row after the COMMENTS row represents a new or updated object on the Marqeta platform. |
Create the object rows
To create a new object, begin a new row in the CSV file after the Comments row with the keywordCREATE. To update an existing object, begin the row in the CSV file with the keyword UPDATE.
The CREATE action represents a POST request to the Core API of the Marqeta platform, while the UPDATE action represents a PUT request.
Follow either action with a comma-separated list of values that matches the fields you included in the HEADERS row, such as CREATE, true, myUserToken, John, Smith.
For each object row of the CSV file, you must specify whether you are creating or updating a user, card, or funding request.
-
For rows that create or update a user, set
ApplyToUsertotrue. -
For rows that create or update a card, set
ApplyToCardtotrue. -
For rows that create a funding request, set
ApplyToFundstotrue.
Warning
You can create a new funding request, but you cannot update an existing request.
You can create a new funding request, but you cannot update an existing request.
HEADERS row with the appropriate value for each record:
- To create a User object – no required field.
-
To create a Card object –
CardProductToken. -
To create a Funding Request object –
FundsAmount.
Upload the file
To upload the bulk file:Select Dashboard in the upper-left corner, select Card management > Card products, and then select a card product.
View the response report
After the Marqeta platform processes your bulk upload file, it generates a response report containing your complete request along with response data for each record in the file. Depending on the size of the upload file, the report may take several minutes to generate. To view the report: In Card products, select Bulk card response in the upper-right corner.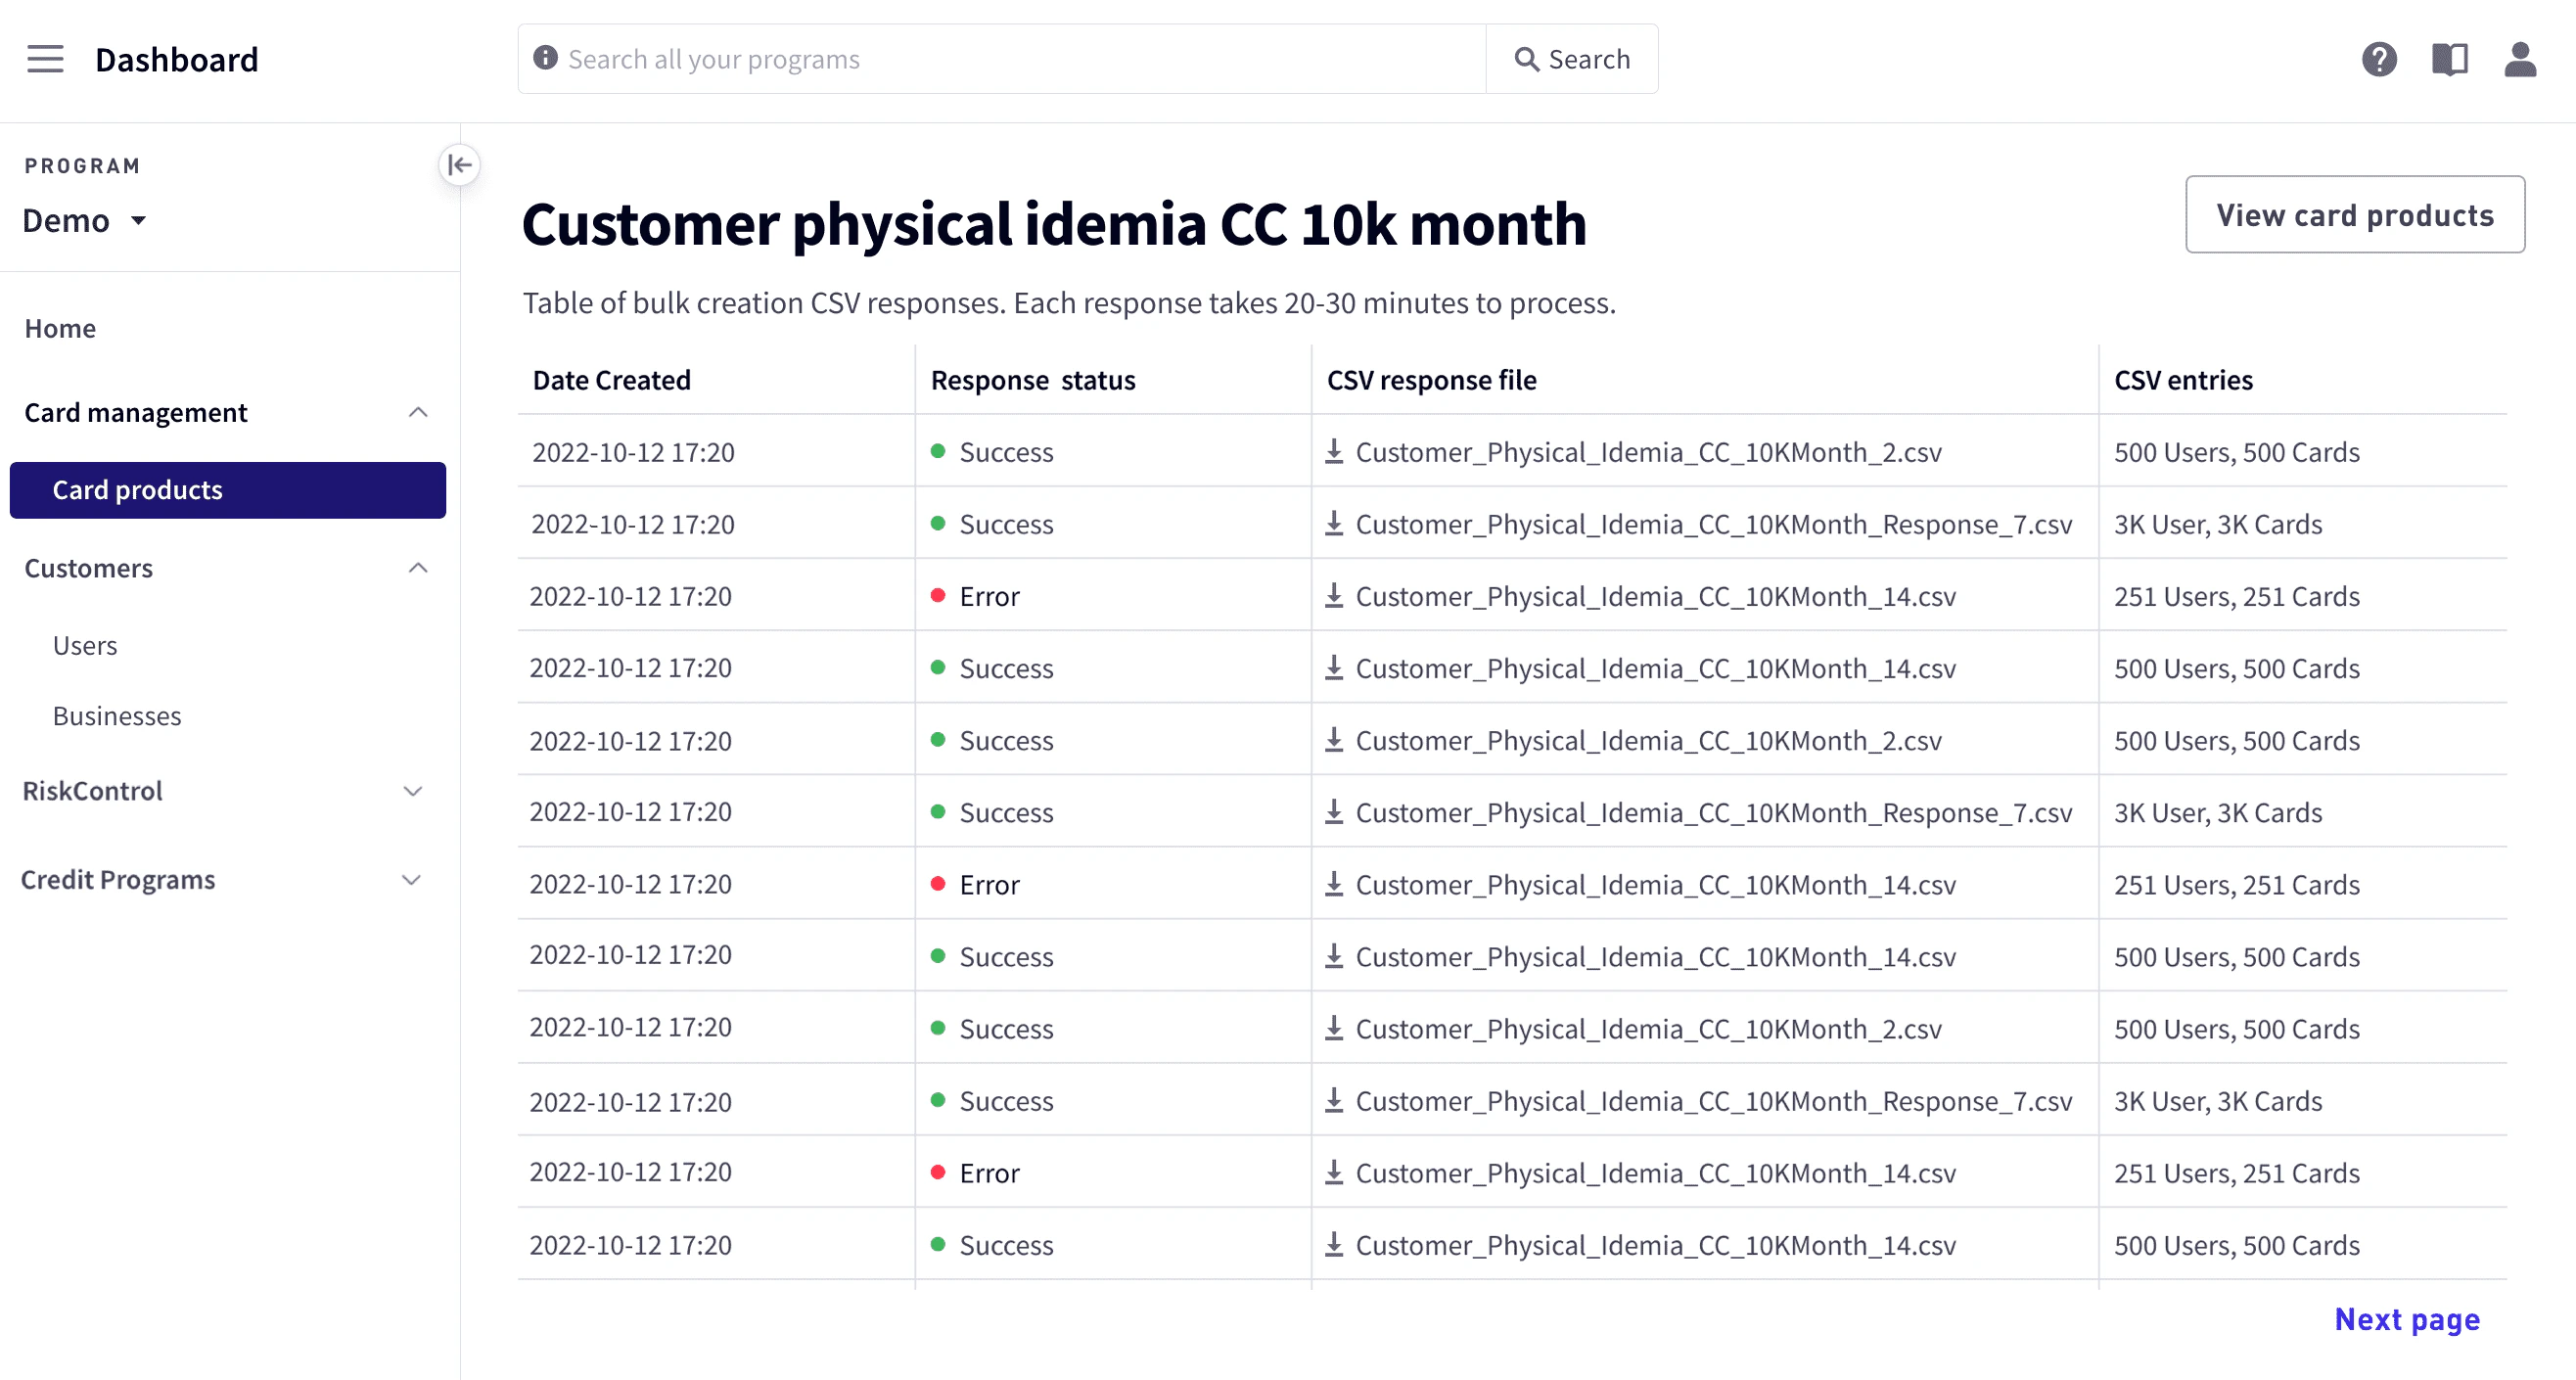
Recovering from an error
If any of the object rows in your bulk upload file generate an error during processing, the Marqeta platform includes the error in the response report. For each object, a description of the error is returned in one of the following fields:-
UserMessage, ifApplyToUseristruein the request. -
CardMessage, ifApplyToCardistruein the request. -
FundsMessage, ifApplyToFundsistruein the request.
Warning
Do not modify the filename or other elements of the response report file.Do not re-upload the original bulk upload file.
Do not modify the filename or other elements of the response report file.Do not re-upload the original bulk upload file.