Note
While the Marqeta.js iframe feature reduces your burden of achieving data security compliance, it does not eliminate it entirely, and is only appropriate for certain use cases. Contact your Marqeta representative about using the Marqeta.js library.
While the Marqeta.js iframe feature reduces your burden of achieving data security compliance, it does not eliminate it entirely, and is only appropriate for certain use cases. Contact your Marqeta representative about using the Marqeta.js library.
- How to integrate with Marqeta.js.
- How to obtain a client access token.
- How to inject the Marqeta.js iframes into your HTML.
Prerequisites
- Read the Core API Quick Start.
- Obtain a valid virtual card token.
Concepts
Data security compliance
Companies that store, transmit, or process sensitive card data, including the primary account number (PAN), card verification value (CVV2), expiration date, and personal identification number (PIN) must comply with the Payment Card Industry Data Security Standard (PCI DSS). Achieving PCI DSS certification is both time consuming and expensive. Marqeta.js offloads some of the PCI compliance burden (for certain use cases) by enabling the encrypted transmission of sensitive card data. Marqeta is fully PCI-Service Provider Level 1 compliant and handles the unencrypted sensitive card data for you. Your servers never store, transmit, or process the card data.Warning
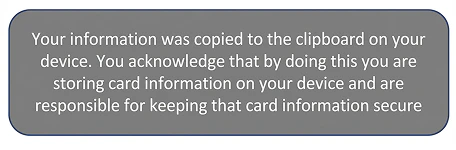
Card data is less secure when copied to the clipboard than when left in this PCI-compliant widget. Cardholders should adopt data security best practices and take precautions to keep their sensitive data safe.
Card data is less secure when copied to the clipboard than when left in this PCI-compliant widget. Cardholders should adopt data security best practices and take precautions to keep their sensitive data safe.
Dynamic card data iframes
The iframes injected by Marqeta.js enable you to control the styling and layout of the HTML pages you serve to client applications, while delegating secure handling of sensitive data to Marqeta servers. They also provide the transparent button UI elements used for copying sensitive data to the clipboard. These elements are transparent so you can overlay them over your custom user interface to intercept click events. They require no customization. You create and style pages in whatever manner you desire, and Marqeta.js inserts the card data and button UI elements into the page locations specified in the HTML.Encryption and card data flow
The following process describes how Marqeta.js injects the iframes into your application. See the tutorials on this page for more details.
The Marqeta API creates a Base64-encoded client access token. This token enables access to the specified card and will expire after five minutes.
Your JavaScript injects the client access token into the
marqeta.bootstrap() method through a configuration object.Marqeta.js injects the card data and buttons into the HTML container:
- If you are displaying card data, this action populates separate iframes for the card’s PAN, CVV2, and expiration date (as well as for their respective Copy to Clipboard buttons, if you decided to integrate the Copy to Clipboard functionality).
- If you are revealing the cardholder’s PIN, this action populates the iframe for the hidden PIN and button used to toggle displaying the PIN. The PIN is initially displayed as •••• until it is toggled.
The configuration object
The.bootstrap() method of Marqeta.js requires a configuration object, which defines the attributes and behaviors of the iframes. Nested under the configuration object is the component object, which accepts either a showPan or a pinReveal object, depending on the action you want to complete. In both cases, you must include the ID of the “div” element into which Marqeta.js injects the individual iframes of card data.
More information on the objects is given the section below.
The configuration object
| Fields | Description |
|---|---|
| configuration.clientAccessToken string Required | Client access token obtained from the Marqeta API. NOTE: If you have migrated from a previous version of the Marqeta.js library and Marqeta has updated your program configuration, the next time you generate a new client access token the URL used to communicate with Marqeta.js will be refreshed to align with the new version you are using. For more information, see Deprecation of Marqeta.js v1.1.0. Allowable Values: Client access token |
| configuration.options string Conditionally required | You must set the cardholderVerificationMethod to OTHER when including the pinReveal component in your application.Allowable Values: OTHER |
| configuration.component.showPan object Required | Specifies the card data to display and applies typographical styling to the data. Include the cardPan object to display the PAN, the cardCvv object to display the CVV2 number, and the cardExp object to display the expiration date.Allowable Values: Any combination of cardPan, cardCvv, and cardExp objects |
| configuration.component.pinReveal object Optional | Specifies how the cardholder’s PIN will be revealed/hidden and applies typographical styling to the data. Include the cardPin object to display the PIN.Allowable Values: cardPin object |
| configuration.component.pinReveal.toggleCardPin object Optional | Your custom event handlers to reveal and hide the cardholder’s PIN. Allowable Values: The domID to associate the toggleCardPin element with its corresponding “div” element, the mode set to transparent, as well as existing objects to toggle the display of the cardholder’s PIN |
| configuration.component.pinReveal.hidePinTimeout object Optional | Specifies when the cardholder’s PIN will time out on the cardholder’s screen and applies typographical styling to the PIN timer message. Allowable Values: The domID to associate the hidePinTimeout element with its corresponding “div” element, as well as a time value to cause the cardholder’s PIN to stop being displayed. |
| configuration.callbackEvents object Optional | Defines customizable event handlers that are executed upon success or failure of iframe rendering. Allowable Values: Existing object |
The showPan object
You must include theshowPan object under the component object, which is itself nested under the configuration object. The showPan object specifies which card attributes to display. It can contain any of the following optional objects:
-
cardPan— The card’s PAN. -
cardCvv— The card’s CVV2. -
cardExp— The card’s expiration date. -
copyCardPan— A transparent button used to copy the card’s PAN to the clipboard. -
copyCardCvv— A transparent button used to copy the card’s CVV2 to the clipboard. -
copyCardExp— A transparent button used to copy the card’s expiration date to the clipboard.
cardPan, cardCvv, or cardExp objects included within the showPan object have their associated values injected as iframes within the div container you specified in the component object.
For each included object, you must specify the div element that contains the iframe.
You can also configure the appearance of the card data using the styles object within each of the cardPan, cardExp, and cardCvv objects. The showPan.copyCardPan, showPan.copyCardCvv, and showPan.copyCardExp objects support transparent mode only, and do not contain a styles object or a span.
Note
Marqeta.js only supports web-safe/system fonts that can be displayed on modern web browsers without a specific download.
Marqeta.js only supports web-safe/system fonts that can be displayed on modern web browsers without a specific download.
| Object | Supported Selectors | Supported Attributes |
|---|---|---|
| cardPan | span, span:hover | color, font-family, font-size, background, font-weight, letter-spacing |
| cardCvv | span, span:hover | color, font-family, font-size, background |
| cardExp | span, span:hover | color, font-family, font-size, background, font-weight, letter-spacing |
The showPan.cardPan and showPan.cardExp objects
| Fields | Description |
|---|---|
| domId string Required | Associates the cardPan and cardExp elements with their corresponding div elements.Allowable Values: Must match the DOM ID of the corresponding “div” element. For example, cardPan.domId must match the ID attribute of the div element that will contain the card PAN iframe. |
| format boolean Optional | Set to true to format the element’s content.The content of cardPan is formatted as:“XXXX XXXX XXXX XXXX” The content of cardExp is formatted as:“XX/XX” Allowable Values: true, falseDefault value: false |
| styles object Optional | A CSS-like style object applied to the iframe holding the card data. Allowable Values: Existing object |
| styles.\ object Optional | Replace \\ with one of the supported selector values.Supported selectors: span, span:hoverSupported CSS attributes: color, font-family, font-size, background, font-weight, letter-spacingNOTE: CSS importing schemes such as @import and @url are not supported. Marqeta.js only supports web-safe/system fonts that can be displayed on modern web browsers without a specific download.Allowable Values: Your custom styles object |
The showPan.cardCvv object
| Fields | Description |
|---|---|
| domId string Required | Associates the cardCvv element with its corresponding div element.Allowable Values: Must match the DOM ID of the corresponding “div” element. That is, cardCvv.domId must match the ID attribute of the div element that will contain the card CVV2 iframe. |
| styles object Optional | A CSS-like style object applied to the iframe holding the card data. Allowable Values: Existing object |
| styles.\ object Optional | Replace \\ with one of the supported selector values.Supported selectors: span, span:hoverSupported CSS attributes: color, font-family, font-size, backgroundNOTE: CSS importing schemes such as @import and @url are not supported. Marqeta.js only supports web-safe/system fonts that can be displayed on modern web browsers without a specific download.Allowable Values: Existing object |
The showPan.copyCardPan, showPan.copyCardCvv, and showPan.copyCardExp objects
| Fields | Description |
|---|---|
| domId string Required | Associates the copyCardPan, copyCardCvv, and copyCardExp elements with their corresponding div elements.Allowable Values: Must match the DOM ID of the corresponding div element. That is, copyCardPan.domId must match the ID attribute of the div element that will contain the card PAN iframe’s Copy to Clipboard button. |
| mode enum Required | With transparent mode, you can customize the look-and-feel of the Copy to Clipboard button within the parent div, and allow the transparent iframe to intercept click events. For example, you can provide your own button UI element inside the div, and the injected iframe will be positioned on top of the button to handle copying the text in a PCI-compliant manner. The iframe injected by Marqeta.js will be transparent, absolutely positioned to the bounds of the parent div element, and given a high z-ordering. The entire iframe region will handle clicks. The parent div element must have its CSS position set to relative, for example style="position: relative;" to ensure it remains tightly aligned with its iframe.Allowable Values: Only transparent is supported |
| onCopySuccess event handler Optional | Called when the element’s text is successfully copied to the clipboard. You can use this callback to update your user interface in response to a click. Allowable Values: A function with no parameters |
| onCopyFailure event handler Optional | Called when an error occurred while attempting to copy the element’s text to the clipboard. Allowable Values: A function with the error object as its parameter |
callbackEvents object specifies the methods executed upon the success and failure events when rendering the iframes.
The pinReveal object
You must include thepinReveal object under the component object, which is itself nested under the configuration object. The pinReveal object specifies the attributes of the cardholder’s PIN to display. It must contain the following objects:
-
toggleCardPin— A transparent button used to toggle the display of the cardholder’s PIN between its initial presentation as •••• and its literal value. There is no functionality available to copy the cardholder’s PIN to the clipboard. -
hidePinTimeout— A customizable timer that allows you to hide the cardholder’s PIN from view as a safety precaution after a preconfigured number of seconds have elapsed. If your cardholder clicks the toggle PIN button while the timer is running, the timer will end and Marqeta.js will hide the PIN from view. If the toggle PIN button is clicked again, the timer will start counting down from the beginning (and not resume the timer’s previous countdown position). -
cardPin— The cardholder’s PIN.
cardPin object included within the pinReveal object has its associated value injected as an iframe within the div container you specified in the component object.
For each included object, you must specify the “div” element that contains the iframe.
You can also configure the appearance of the cardholder’s PIN using the styles object within each of the cardPin objects. The pinReveal.cardPin object supports transparent mode only.
Note
Marqeta.js only supports web-safe/system fonts that can be displayed on modern web browsers without a specific download.
Marqeta.js only supports web-safe/system fonts that can be displayed on modern web browsers without a specific download.
| Object | Supported Selectors | Supported Attributes |
|---|---|---|
| cardPin | span, span:hover | color, font-family, font-size, background, font-weight, letter-spacing |
hidePinTimeout object, you can restyle the timer message so it aligns with your application’s look and branding. This includes repositioning the timer message to your preferred location on the screen.
The pinReveal.cardPin object
| Fields | Description |
|---|---|
| domId string Required | Associates the cardPin element with its corresponding div element.Allowable Values: Must match the DOM ID of the corresponding “div” element. For example, cardPin.domId must match the id attribute of the “div” element that will contain the PIN’s iframe. |
| format boolean Optional | Set to true to format the element’s content.The content of cardPin is formatted as:“XXXX” Allowable Values: true, falseDefault value: false |
| styles object Optional | A CSS-like style object applied to the iframe holding the cardholder’s PIN. Allowable Values: Existing object |
| styles.\ object Optional | Replace \\ with one of the supported selector values.Supported selectors: span, span:hoverSupported CSS attributes: color, font-family, font-size, background, font-weight, letter-spacingNOTE: CSS importing schemes such as @import and @url are not supported. Marqeta.js only supports web-safe/system fonts that can be displayed on modern web browsers without a specific download.Allowable Values: Your custom styles object |
The pinReveal.toggleCardPin object
| Fields | Description |
|---|---|
| domId string Required | Associates the toggleCardPin element with its corresponding div element.Allowable Values: Must match the DOM ID of the corresponding “div” element. For example, toggleCardPin.domId must match the id attribute of the “div” element that will contain the PIN’s iframe. |
| mode enum Required | With transparent mode, you can customize the look-and-feel of the Reveal PIN button within the parent div, and allow the transparent iframe to intercept click events. For example, you can provide your own button UI element inside the div, and the injected iframe will be positioned on top of the button to handle toggling the display of the cardholder’s PIN in a PCI-compliant manner. The iframe injected by Marqeta.js will be transparent, absolutely positioned to the bounds of the parent div element, and given a high z-ordering. The entire iframe region will handle clicks. The parent div element must have its CSS position set to relative, for example style="position: relative;" to ensure it remains tightly aligned with its iframe.Allowable Values: Only transparent is supported |
| onRevealSuccess event handler Optional | Executed upon success of iframe rendering. You can customize the method within this event handler to perform whatever action you want when the cardholder’s PIN has been successfully revealed. Allowable Values: A method |
| onHideSuccess event handler Optional | Executed upon success of iframe rendering. You can customize the method within this event handler to perform whatever action you want when the cardholder’s PIN has been successfully hidden. Allowable Values: A method |
The pinReveal.hidePinTimeout object
| Fields | Description |
|---|---|
| domId string Required | Associates the hidePinTimeout element with its corresponding div element.Allowable Values: Must match the DOM ID of the corresponding “div” element. For example, hidePinTimeout.domId must match the id attribute of the “div” element that will contain the PIN’s iframe. |
| hideTimeout integer Required | Period of time after which the cardholder’s PIN will be automatically hidden from view on the cardholder’s screen as a security precaution. Expressed in seconds. Allowable Values: minimum: 5 maximum: 15 |
| styles object Optional | A CSS-like style object applied to the iframe holding the PIN timer message. Allowable Values: Existing object |
| styles.\ object Optional | Replace \\ with the supported selector value.Supported selector: spanSupported CSS attributes: color, font-family, font-size, background, font-weight, letter-spacingNOTE: CSS importing schemes such as @import and @url are not supported. Marqeta.js only supports web-safe/system fonts that can be displayed on modern web browsers without a specific download.Allowable Values: Your custom styles object |
The callbackEvents object
| Fields | Description |
|---|---|
| onSuccess event handler Optional | Executed upon success of iframe rendering. You can customize the method within this event handler to perform whatever action you want. Allowable Values: A method |
| onFailure event handler Optional | Executed upon failure of iframe rendering. You can customize the method within this event handler to perform whatever action you want. Allowable Values: A method |
Copying card data to the clipboard
You can add transparent iframes to your application or webpage that capture clicks to copy a card’s PAN, CVV2, or expiration date to the clipboard of the cardholder’s device. For example, in a POS financing scenario, your cardholders can click the buttons provided by the.copyToClipboard() method to help them avoid manually copying card data from a newly issued virtual card to the vendor’s application where they are making a purchase.
Each iframe is associated with a parent div element. Your application or webpage requires a separate parent div element for each card data element you want to copy to the clipboard.
The iframe containing the transparent Copy to Clipboard button is positioned precisely to the bounds of the parent div, so that it can intercept all click events. If your button is not responding to clicks, ensure that the iframe is positioned correctly. By handling the clicks within an iframe, your application avoids entering PCI scope.
You must supply your own visible button UI element inside each parent div that contains the card data to copy.
To respond to clicks within the parent div, you must specify a callback function for the onCopySuccess field. This event handler is triggered when data is successfully copied to the clipboard in response to a click event, enabling you to perform an action such as updating your application’s user interface or webpage.
The following HTML example displays a Copy PAN to Clipboard button as an icon:
HTML
localStorage because that is where Marqeta.js keeps track of the last time the notification was presented.
!important rule.
Displaying a toast notification on the implications of copying sensitive card data to the clipboard is not a PCI compliance requirement. If you do not want to display this toast notification to your cardholders, simply set the clipboardWarning key to undefined from localStorage.
JavaScript
Resetting Marqeta.js
Marqeta.js also provides a.destroy() method. Run marqeta.destroy() to reset Marqeta.js and any existing configurations, by clearing all the listeners.
In some situations, you might prefer to call marqeta.bootstrap() instead of calling marqeta.destroy(). One example would be if you wanted to display the data from another card. If you use this approach, however, your client access token will expire. Don’t forget to obtain a new client access token first, as explained in Step 6 of the card data tutorial.
Card data tutorial
This tutorial shows you how to display a virtual card’s sensitive data using iframes on your application or webpage. In this scenario, you will display a virtual card’s PAN, expiration date, and CVV2 on an otherwise blank webpage, enabling you to display a virtual card’s data to your customer. You will also add three buttons to facilitate copying card data to the clipboard.Note
This tutorial assumes you have already worked with Marqeta to enable Marqeta.js for your program. You cannot complete these steps in the public sandbox.
This tutorial assumes you have already worked with Marqeta to enable Marqeta.js for your program. You cannot complete these steps in the public sandbox.
HTML
Step 1 — Prepare a blank HTML page
Before integrating with Marqeta.js to display card data, prepare an otherwise blank HTML page. Create a new HTML file and add the following code:HTML
Step 2 — Reference Marqeta.js
If you are working in your private sandbox environment, add the following script tag to your HTML:HTML
HTML
Step 3 — Add a marqeta.bootstrap() method call
To inject the iframes into your HTML, call themarqeta.bootstrap() method of Marqeta.js from your HTML.
Add the following script tag to your HTML after the reference to Marqeta.js. You’ll need to pass an object to the method, but leave it empty for now.
HTML
Step 4 — Add target div elements
To present all three pieces of card data, create three div elements—one each for the PAN, expiration date, and CVV2. Assign a unique ID to each div; you will use these IDs in themarqeta.bootstrap() configuration object.
Add the following code to your HTML:
HTML
300 px or to a relative value such as 75%.
If you set the iframe’s width to 100%, it will expand to fill the size of the parent container. In terms of the span, its text will stop wrapping once it is wide enough. In many cases, it is recommended to set the iframe width to 100%, and then style the parent container to the width you actually need.
Step 5 — Add the bootstrap configuration object
Use theconfiguration object to define how the iframes appear on your webpage. Make sure to include the required data. You can configure Marqeta.js to display any combination of the card’s PAN, CVV2, and expiration date.
In this scenario, you will display the PAN, CVV2, and expiration date, providing the necessary card data for your customer.
You have the option of supplying style-related information inline (see mq-card-pan below) or as a custom style object you create (see the mq-card-exp style object styles.cardExp.styles below).
Add the following object as an argument for the bootstrap() method. Later steps in this tutorial will explain how to retrieve the data that replaces the placeholder text.
JSON
Step 6 — Request a client access token
Each time you want to display a virtual card’s sensitive data, you must request a new client access token. The client access token expires after five minutes. Request a client access token from the Marqeta platform by sending aPOST request to the /users/auth/clientaccesstoken endpoint.
Use the following cURL to request an access token. Replace the following placeholder text:
- YOUR APPLICATION TOKEN
- YOUR ADMIN ACCESS TOKEN
- CARD TOKEN
- YOUR SUBDOMAIN
cURL
JSON
bootstrap() method.
Step 7 — Add “Copy to Clipboard” buttons
Use the following set of HTML buttons to enable cardholders to copy card data elements to the clipboard of their device. Add the following HTML to the page, at the top of the<body> tag, after the line <div id='mq-card-cvv'></div>:
HTML
Warning
The images referenced in the above example will not load because this is not an actual resource as-is.
The images referenced in the above example will not load because this is not an actual resource as-is.
marqeta.bootstrap() method to configure these iframes:
JSON
Step 8 — Add a hover state
A hover state is a style configuration that you pass to themarqeta.bootstrap() method. The parent div receives hover events from its associated iframe.
To implement a hover state, add the following CSS statements to the HTML page inside the <head> tags:
HTML
Step 9 — Run marqeta.bootstrap()
When the page loads,marqeta.bootstrap() injects the iframe populated with card data and styles into the inner container div elements mq-card-pan, mq-card-exp, and mq-card-cvv, as specified in the configuration object. The Copy to Clipboard iframes are also injected if you choose to integrate the Copy to Clipboard functionality.
PIN reveal tutorial
This tutorial shows you how to display a cardholder’s PIN using iframes on your application or webpage. In this scenario, you will display a cardholder’s PIN on an otherwise blank webpage. After the predetermined time limit has elapsed, the PIN is automatically hidden from view as a security precaution. If your cardholder clicks the toggle PIN button while the timer is running, the timer will end and Marqeta.js will hide the PIN from view. If the toggle PIN button is clicked again, the timer will start counting down from the beginning (and not resume the timer’s previous countdown position).Note
This tutorial assumes you have already worked with Marqeta to enable Marqeta.js for your program. You cannot complete these steps in the public sandbox.
This tutorial assumes you have already worked with Marqeta to enable Marqeta.js for your program. You cannot complete these steps in the public sandbox.
HTML
Step 1 — Prepare a blank HTML page
Before integrating with Marqeta.js to display card data, prepare an otherwise blank HTML page. Create a new HTML file and add the following code:HTML
Step 2 — Reference Marqeta.js
If you are working in your private sandbox environment, add the following script tag to your HTML:HTML
HTML
Step 3 — Add a marqeta.bootstrap() method call
To inject the iframes into your HTML, call themarqeta.bootstrap() method of Marqeta.js from your HTML.
Add the following script tag to your HTML after the reference to Marqeta.js. You’ll need to pass an object to the method, but leave it empty for now.
HTML
Step 4 — Add target div element
To present the cardholder’s PIN, create a div element for it here. Assign a unique ID to the each div; you will use this ID in thecomponent object of marqeta.bootstrap().
Add the following code to your HTML:
HTML
300 px or to a relative value such as 75%.
If you set the iframe’s width to 100%, it will expand to fill the size of the parent container. In terms of the span, its text will stop wrapping once it is wide enough. In many cases, it is recommended to set the iframe width to 100%, and then style the parent container to the width you actually need.
Step 5 — Add the bootstrap configuration object
Use thecomponent object to define how the iframes appear on your webpage. Make sure to include the required data. In this scenario, you will display the cardholder’s PIN.
You have the option of supplying style-related information inline (see mq-card-pin below) or as a custom style object you create (see the mq-card-exp style object styles.cardExp.styles in the Card Data tutorial above).
Add the following object as an argument for the bootstrap() method. Later steps in this tutorial will explain how to retrieve the data that replaces the placeholder text.
JSON
Step 6 — Add a timeout value
The timeout value is the number of seconds after which Marqeta.js will hide the PIN from view as a safety precaution. In this step, you also add the styling information that will apply to the PIN timer’s message. If your cardholder clicks the toggle PIN button while the timer is running, the timer will end and Marqeta.js will hide the PIN from view. If the toggle PIN button is clicked again, the timer will start counting down from the beginning (and not resume the timer’s previous countdown position). Add the following code to your HTML:JSON
Step 7 — Request a client access token
Each time you want to display a virtual card’s sensitive data, you must request a new client access token. The client access token expires after five minutes. Request a client access token from the Marqeta platform by sending aPOST request to the /users/auth/clientaccesstoken endpoint.
Use the following cURL to request an access token. Replace the following placeholder text:
- YOUR APPLICATION TOKEN
- YOUR ADMIN ACCESS TOKEN
- CARD TOKEN
- YOUR SUBDOMAIN
cURL
JSON
bootstrap() method.
Step 8 — Add a hover state
A hover state is a style configuration that you pass to themarqeta.bootstrap() method. The parent div receives hover events from its associated iframe.
To implement a hover state, add the following CSS statements to the HTML page inside the <head> tags:
HTML
Step 9 — Run marqeta.bootstrap()
When the page loads,marqeta.bootstrap() injects the iframes populated with card data and styles into the inner container div elements of mq-card-pin and mq-toggle-card-pin. The bootstrap() method also injects a div element with the timeout message and styles into the inner container span element mq-pin-timeout.