Warning
This page is currently deprecated and the functionality it describes will soon be unavailable. To learn more, contact your Marqeta representative.
This page is currently deprecated and the functionality it describes will soon be unavailable. To learn more, contact your Marqeta representative.
.copyToClipboard() method is no longer supported. It is recommended that you upgrade your integration to version v1.1.0 in order to continue supporting the security policies of all major browsers. You can view the current version of the documentation here.
Marqeta provides a JavaScript library that enables you to display sensitive card data in your application or webpage while limiting your data security compliance burden.
Marqeta.js injects a set of configurable iframes into your HTML showing the cardholder’s card data. The iframes enable you to display a virtual card without handling sensitive card data on your servers. Instead, Marqeta hosts the data on secure, compliant servers. You can present a complete card—including the PAN, expiration date, and CVV2 elements—or individual elements. You can also add one or more buttons to your application or webpage that copy a card’s PAN, expiration date, or CVV2 to the clipboard.
Note
While the Marqeta.js iframe feature reduces your burden of achieving data security compliance, it does not eliminate it entirely, and is only appropriate for certain use cases. Contact your Marqeta representative about using the Marqeta.js library.
While the Marqeta.js iframe feature reduces your burden of achieving data security compliance, it does not eliminate it entirely, and is only appropriate for certain use cases. Contact your Marqeta representative about using the Marqeta.js library.
- How to integrate with Marqeta.js.
- How to obtain a client access token.
- How to inject the Marqeta.js iframes into your HTML.
Prerequisites
- Read the Core API Quick Start.
- Obtain an existing virtual card token.
Concepts
Data security compliance
Companies that store, transmit, or process sensitive card data, including the primary account number (PAN), expiration date, and card verification value (CVV2), must comply with the Payment Card Industry Data Security Standard (PCI DSS). Achieving PCI DSS certification is both time consuming and expensive. Marqeta.js offloads some of the PCI compliance burden (for certain use cases) by enabling the encrypted transmission of sensitive card data. Marqeta is fully PCI-Service Provider Level 1 compliant and handles the unencrypted sensitive card data for you. Your servers never store, transmit, or process the card data.Warning
Card data is less secure when copied to the clipboard than when left in this PCI-compliant widget. Cardholders should adopt data security best practices and take precautions to keep their sensitive data safe.
Card data is less secure when copied to the clipboard than when left in this PCI-compliant widget. Cardholders should adopt data security best practices and take precautions to keep their sensitive data safe.
Dynamic card data iframes
The iframes injected by Marqeta.js enable you to control the styling and layout of the HTML pages you serve to client applications while delegating secure handling of the sensitive data to Marqeta servers. You create and style pages in whatever manner you desire and Marqeta.js inserts the card data into the page locations specified in the HTML.Encryption and card data flow
The following process describes how Marqeta.js injects the iframes into your application. See the tutorial on this page for more details.
The Marqeta API creates a Base64-encoded client access token. This token enables access to the specified card and will expire after five minutes.
Marqeta.js injects the card data into the HTML container using separate iframes for the card’s PAN, CVV2, and expiration date.
The configuration object
The.bootstrap() method of Marqeta.js requires a configuration object, which defines the attributes and behaviors of the iframes. You must include the ID of the div element into which Marqeta.js injects the individual iframes of card data.
The configuration object
| Fields | Description |
|---|---|
| clientAccessToken string Required | Client access token obtained from the Marqeta API. Allowable Values: Client access token |
| integrationType string Required | Set to custom.Allowable Values: custom |
| containerId string Required | Identifies the outer div element whose child div elements will be injected with PAN, CVV2 and expiration date iframes. Allowable Values: Must match the id of the outermost “div” element. |
| showPan object Required | Specifies the card data to display and applies typographical styling to the data. Include the cardPan object to display the PAN, the cardExp object to display the expiration date, and the cardCvv object to display the CVV2 number.Allowable Values: Any combination of cardPan, cardExp, and cardCvv objects. |
| callbackEvents object Optional | Defines customizable event handlers that are executed upon success or failure of iframe rendering. Allowable Values: Existing object. |
showPan object. The showPan object specifies which card attributes to display. It can contain the following objects:
-
cardPan— The card’s PAN -
cardExp— The card’s expiration date -
cardCvv— The card’s CVV2
showPan object. Objects included within the showPan object have their associated values injected as iframes within the div container you specified in the configuration object. For each included object, you must specify the div element that contains the iframe.
You can also configure the appearance of the card data using the styles object within each of the cardPan, cardExp, and cardCvv objects.
| Object | Supported Selectors | Supported Attributes |
|---|---|---|
| cardPan | span, span:hover | color, font-family, font-size, background, font-weight, letter-spacing |
| cardExp | span, span:hover | color, font-family, font-size, background, font-weight, letter-spacing |
| cardCvv | span, span:hover | color, font-family, font-size, background |
| Fields | Description |
|---|---|
| domId string Required | Associates the cardPan and cardExp elements with their corresponding div elements. Allowable Values: Must match the DOM ID of the corresponding “div” element. For example, showPan.domId must match the id attribute of the div element that will contain the card’s PAN iframe. |
| format boolean Optional | Set to true to format the element’s content. The content of cardPan is formatted as: “XXXX XXXX XXXX XXX” The content of cardExp is formatted as: “XX/XX” Allowable Values: true, false Default value: false |
| styles object Optional | A CSS-like style object applied to the iframe holding the card data. Allowable Values: Existing object. |
| styles.\ object Optional | Replace \ with one of the supported selector values. Supported selectors: span, span:hover Supported CSS attributes: color, font-family, font-size, background, font-weight, letter-spacing NOTE: CSS importing schemes such as @import and @url are not supported. Allowable Values: Existing object. |
| Fields | Description |
|---|---|
| domId string Required | Associates the cardCvv element with its corresponding div element. Allowable Values: Must match the DOM ID of the corresponding “div” element. For example, cardCvv.domId must match the id attribute of the div element that will contain the card’s CVV2 iframe. |
| styles object Optional | A CSS-like style object applied to the iframe holding the card data. Allowable Values: |
| styles.\ object Optional | Replace \ with one of the supported selector values. Supported selectors: span, span:hover Supported CSS attributes: color, font-family, font-size, background NOTE: CSS importing schemes such as @import and @url are not supported. Allowable Values: |
callbackEvents object specifies the methods executed upon success and failure events when rendering the iframes.
The callbackEvents object
| Fields | Description |
|---|---|
| onSuccess event handler Optional | Executed upon success of iframe rendering. You can customize the method within this event handler to perform whatever action you want. Allowable Values: A method |
| onFailure event handler Optional | Executed upon failure of iframe rendering. You can customize the method within this event handler to perform whatever action you want. Allowable Values: A method |
Copying card data to the clipboard
You can add the.copyToClipboard() method to your application or webpage to add buttons that copy a card’s PAN, expiration date, or CVV2 to the clipboard of the cardholder’s device. For example, in a POS financing scenario, your cardholders can click the buttons provided by the .copyToClipboard() method to help them avoid manually copying card data from a newly issued virtual card to the vendor’s application where they are making a purchase.
For each button, you must specify the ID of the div element that contains the card data to copy. The following HTML example adds a button that copies the contents of the “mq-card-pan” div element to the clipboard:
<button onclick="marqeta.copyToClipboard('mq-card-pan')">Copy card number</button>
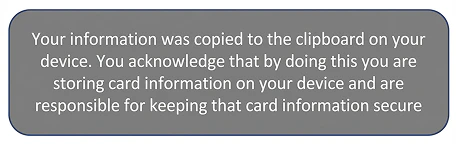
When the cardholder clicks any of the “Copy to clipboard” buttons, Marqeta.js displays a toast notification in the upper-right corner of the application window or webpage. The toast notification informs the cardholder of the implications of copying sensitive card data to the clipboard. After Marqeta.js displays the notification, it is not presented to the cardholder again on the same device for 90 days to optimize the user experience.
!important rule.
Resetting Marqeta.js
Marqeta.js also provides a.destroy() method. Run marqeta.destroy() to reset Marqeta.js and any existing configurations.
Tutorial
This tutorial shows you how to display a virtual card’s sensitive data using iframes on your webpage or application. In this scenario, you will display a virtual card’s PAN, expiration date, and CVV2 on an otherwise blank webpage, enabling you to display a virtual card’s data to your customer. You will also add three buttons to facilitate copying card data to the clipboard.Note
This tutorial assumes you have already worked with Marqeta to enable Marqeta.js for your program.
This tutorial assumes you have already worked with Marqeta to enable Marqeta.js for your program.
HTML
Step One: Prepare a blank HTML page
Before integrating with Marqeta.js, prepare an otherwise blank HTML page. Create a new HTML file and add the following code:HTML
Step Two: Reference Marqeta.js
If you are working in a production environment, add the following script tag to your HTML:HTML
HTML
Step Three: Add a marqeta.bootstrap() method call
To inject the iframes into your HTML, call themarqeta.bootstrap() method of Marqeta.js from your HTML.
Add the following script tag to your HTML after the reference to Marqeta.js. You’ll need to pass an object to the method, but leave it empty for now.
HTML
Step Four: Add a target div
To present all three pieces of card data, create four divs—one each for the PAN, expiration date, and CVV2, and another to contain the other three divs. Assign a unique ID to each div; you will use these IDs in themarqeta.bootstrap() configuration object.
Add the following code to your HTML:
HTML
Step Five: Add the bootstrap configuration object
Use the configuration object to define how the iframes appear on your webpage. Make sure to include the required data. You can configure Marqeta.js to display any combination of the card’s PAN, CVV2, and expiration date. In this scenario, you will display the PAN, CVV2, and expiration date, providing the necessary card data for your customer. Add the following object as a parameter for thebootstrap() method. Later steps in this exercise will explain how to retrieve the data that replaces the placeholder text.
JSON
Step Six: Request a client access token
Each time you want to display a virtual card’s sensitive data, you must request a new client access token. The client access token expires after five minutes. Request a client access token from the Marqeta platform by sending aPOST request to the /users/auth/clientaccesstoken endpoint.
Use the following cURL to request an access token. Replace the following placeholder text:
- YOUR APPLICATION TOKEN
- YOUR MASTER ACCESS TOKEN
- CARD TOKEN
- YOUR SUBDOMAIN
cURL
JSON
bootstrap() method.
Step Seven: Add “Copy to clipboard” buttons
Use the.copyToClipboard() method with a set of HTML buttons to enable cardholders to copy card data elements to the clipboard.
Add the following HTML to the page, after the ‘virtual-card-container’ div:
HTML
Step Eight: Run marqeta.bootstrap()
When the page loads,marqeta.bootstrap() injects the iframe populated with card data and styles into the inner container div elements “mq-card-pan”, “mq-card-exp”, and “mq-card-cvv”, as specified in the configuration object.
Note
You can check the console of your browser for the success or failure message, as defined in the callbackEvents object.
You can check the console of your browser for the success or failure message, as defined in the callbackEvents object.