Filtering your cases
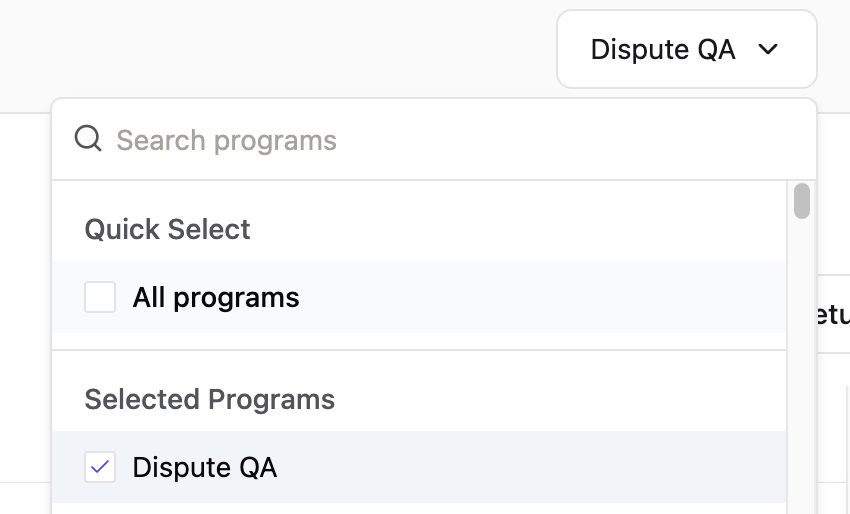
Before you build a filter, choose the scope you want to work in from the dropdown in the top right of the Home page:- All Programs — View cases across every program.
- Single Program — Focus on one specific program.
- Case state — Filter by where cases currently are in the lifecycle, such as open, in review, or closed.
- Dispute reason — Filter by the card network reason code assigned to the dispute.
- Regulation — Filter by the regulatory framework governing the dispute.
Searching across programs
The Disputes portal supports cross-program search, allowing you to find cases across all programs without switching scope. You can search by token directly from the All Programs view.Search by transaction token
Use the transaction token from a completed transaction to find its dispute case:
The case opens in the Dispute Lifecycle tab.
Search by case token
Use the case token to open a case directly:
The case opens in the Dispute Lifecycle tab.
Filtering and saving custom views
If you rely on the same filters regularly, save them as a custom view so you don’t have to rebuild them each time.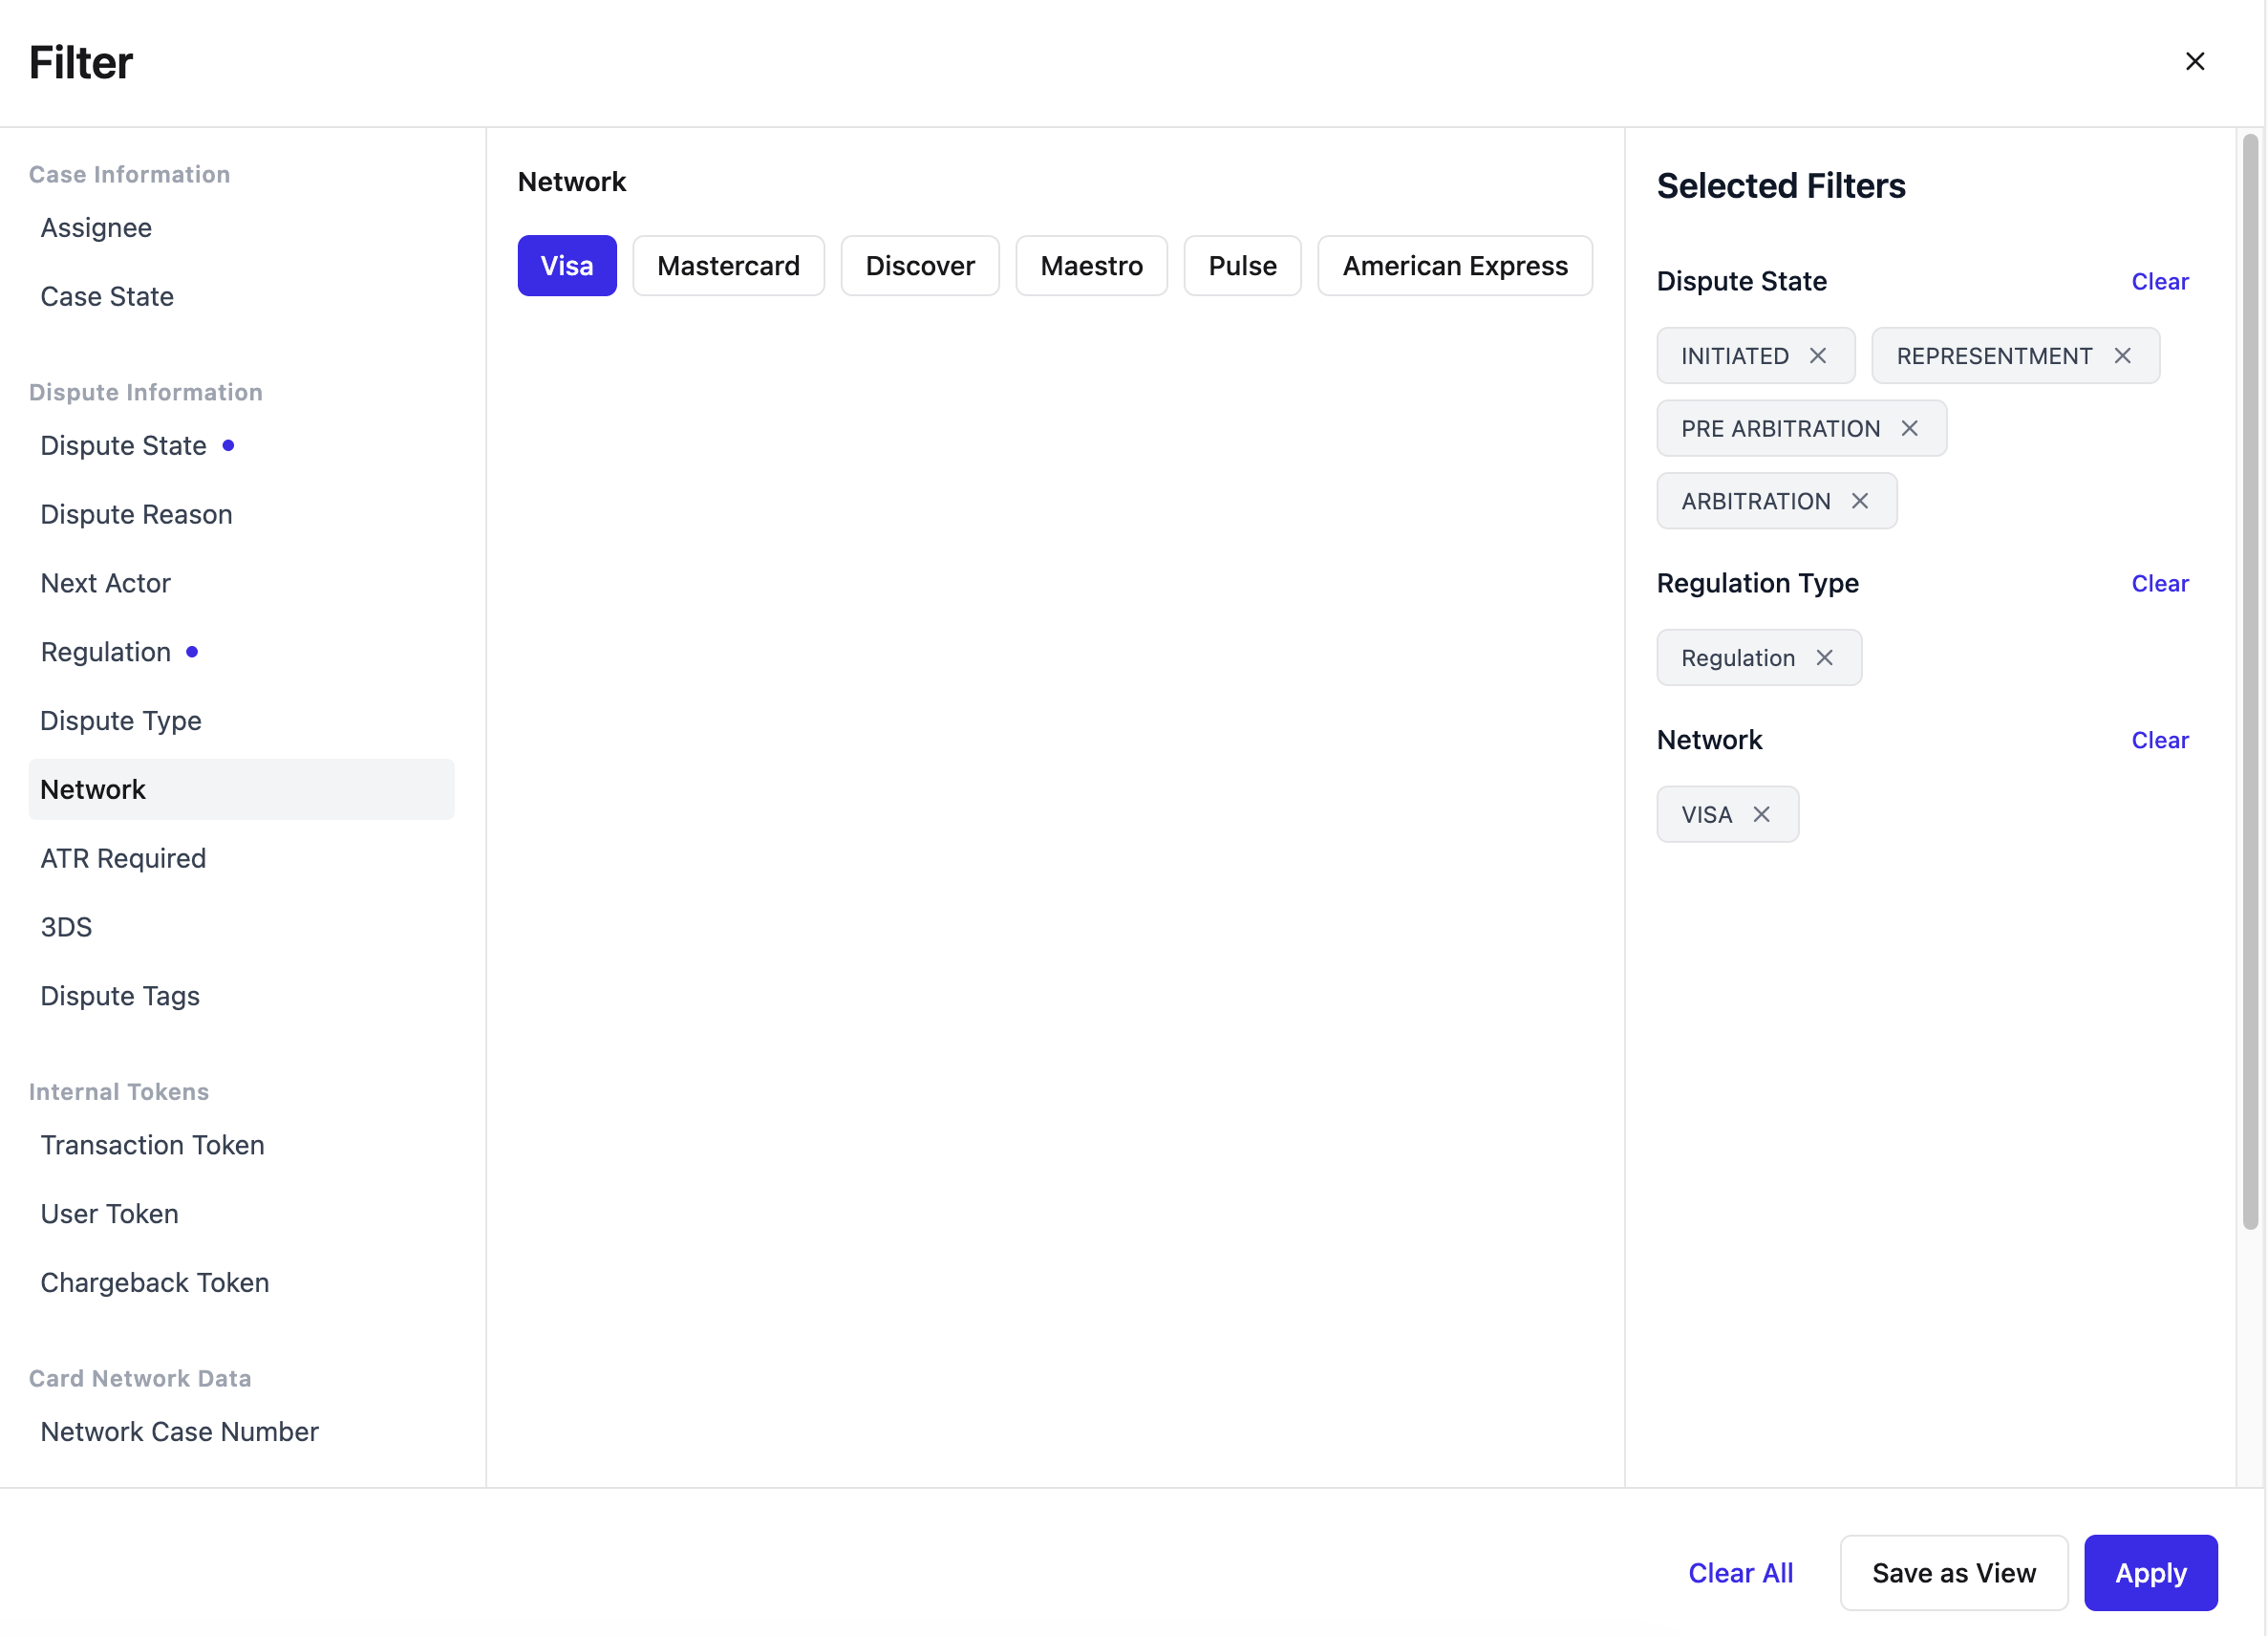
You’ll find all your saved views under All Cases > Views.
Best practices
A few habits make finding and organizing work faster:- Filter before you search. Narrow results by case state, dispute reason, or regulation before doing a token search.
- Combine column filters. Typing criteria into multiple columns narrows results quickly.
- Name views clearly. Descriptive names and distinct icons make the right view easy to spot.
- Save frequently used filters. Don’t rebuild the same filters repeatedly.
- Keep tokens handy. Saving transaction and case tokens gives you quick access back to a case.
- Use cross-program search. When you’re not sure which program a case belongs to, search from the All Programs view.