Case tabs
Each case has tabs across the top of the screen that organize its information and tools. Click a tab to switch between views without leaving the case.- Dispute Lifecycle — The main workspace for managing the case. See Transitioning Cases for details on working in this tab.
- Documents — Upload and review files attached to the case.
- Evidences — Upload and manage evidence for the case.
- Activity — A history of every action taken on the case.
- Related Transactions — The complete transaction timeline, from authorization through chargeback.
- User Transactions — All transactions associated with the cardholder.
Side panel
The side panel on the right stays visible while you work across all tabs. It provides quick reference information without requiring you to navigate away from your current view. Click any section in the side panel to expand it and see more details. The side panel includes:- Point of Interaction — Details about where and how the transaction occurred.
- Merchant — Information about the merchant involved in the transaction.
- Cardholder profile — Details about the cardholder who filed the dispute.
- Card details — Information about the card used in the transaction.
- User disputes summary — A summary of the cardholder’s dispute history.
- Transaction disputes overview — An overview of disputes associated with the transaction.
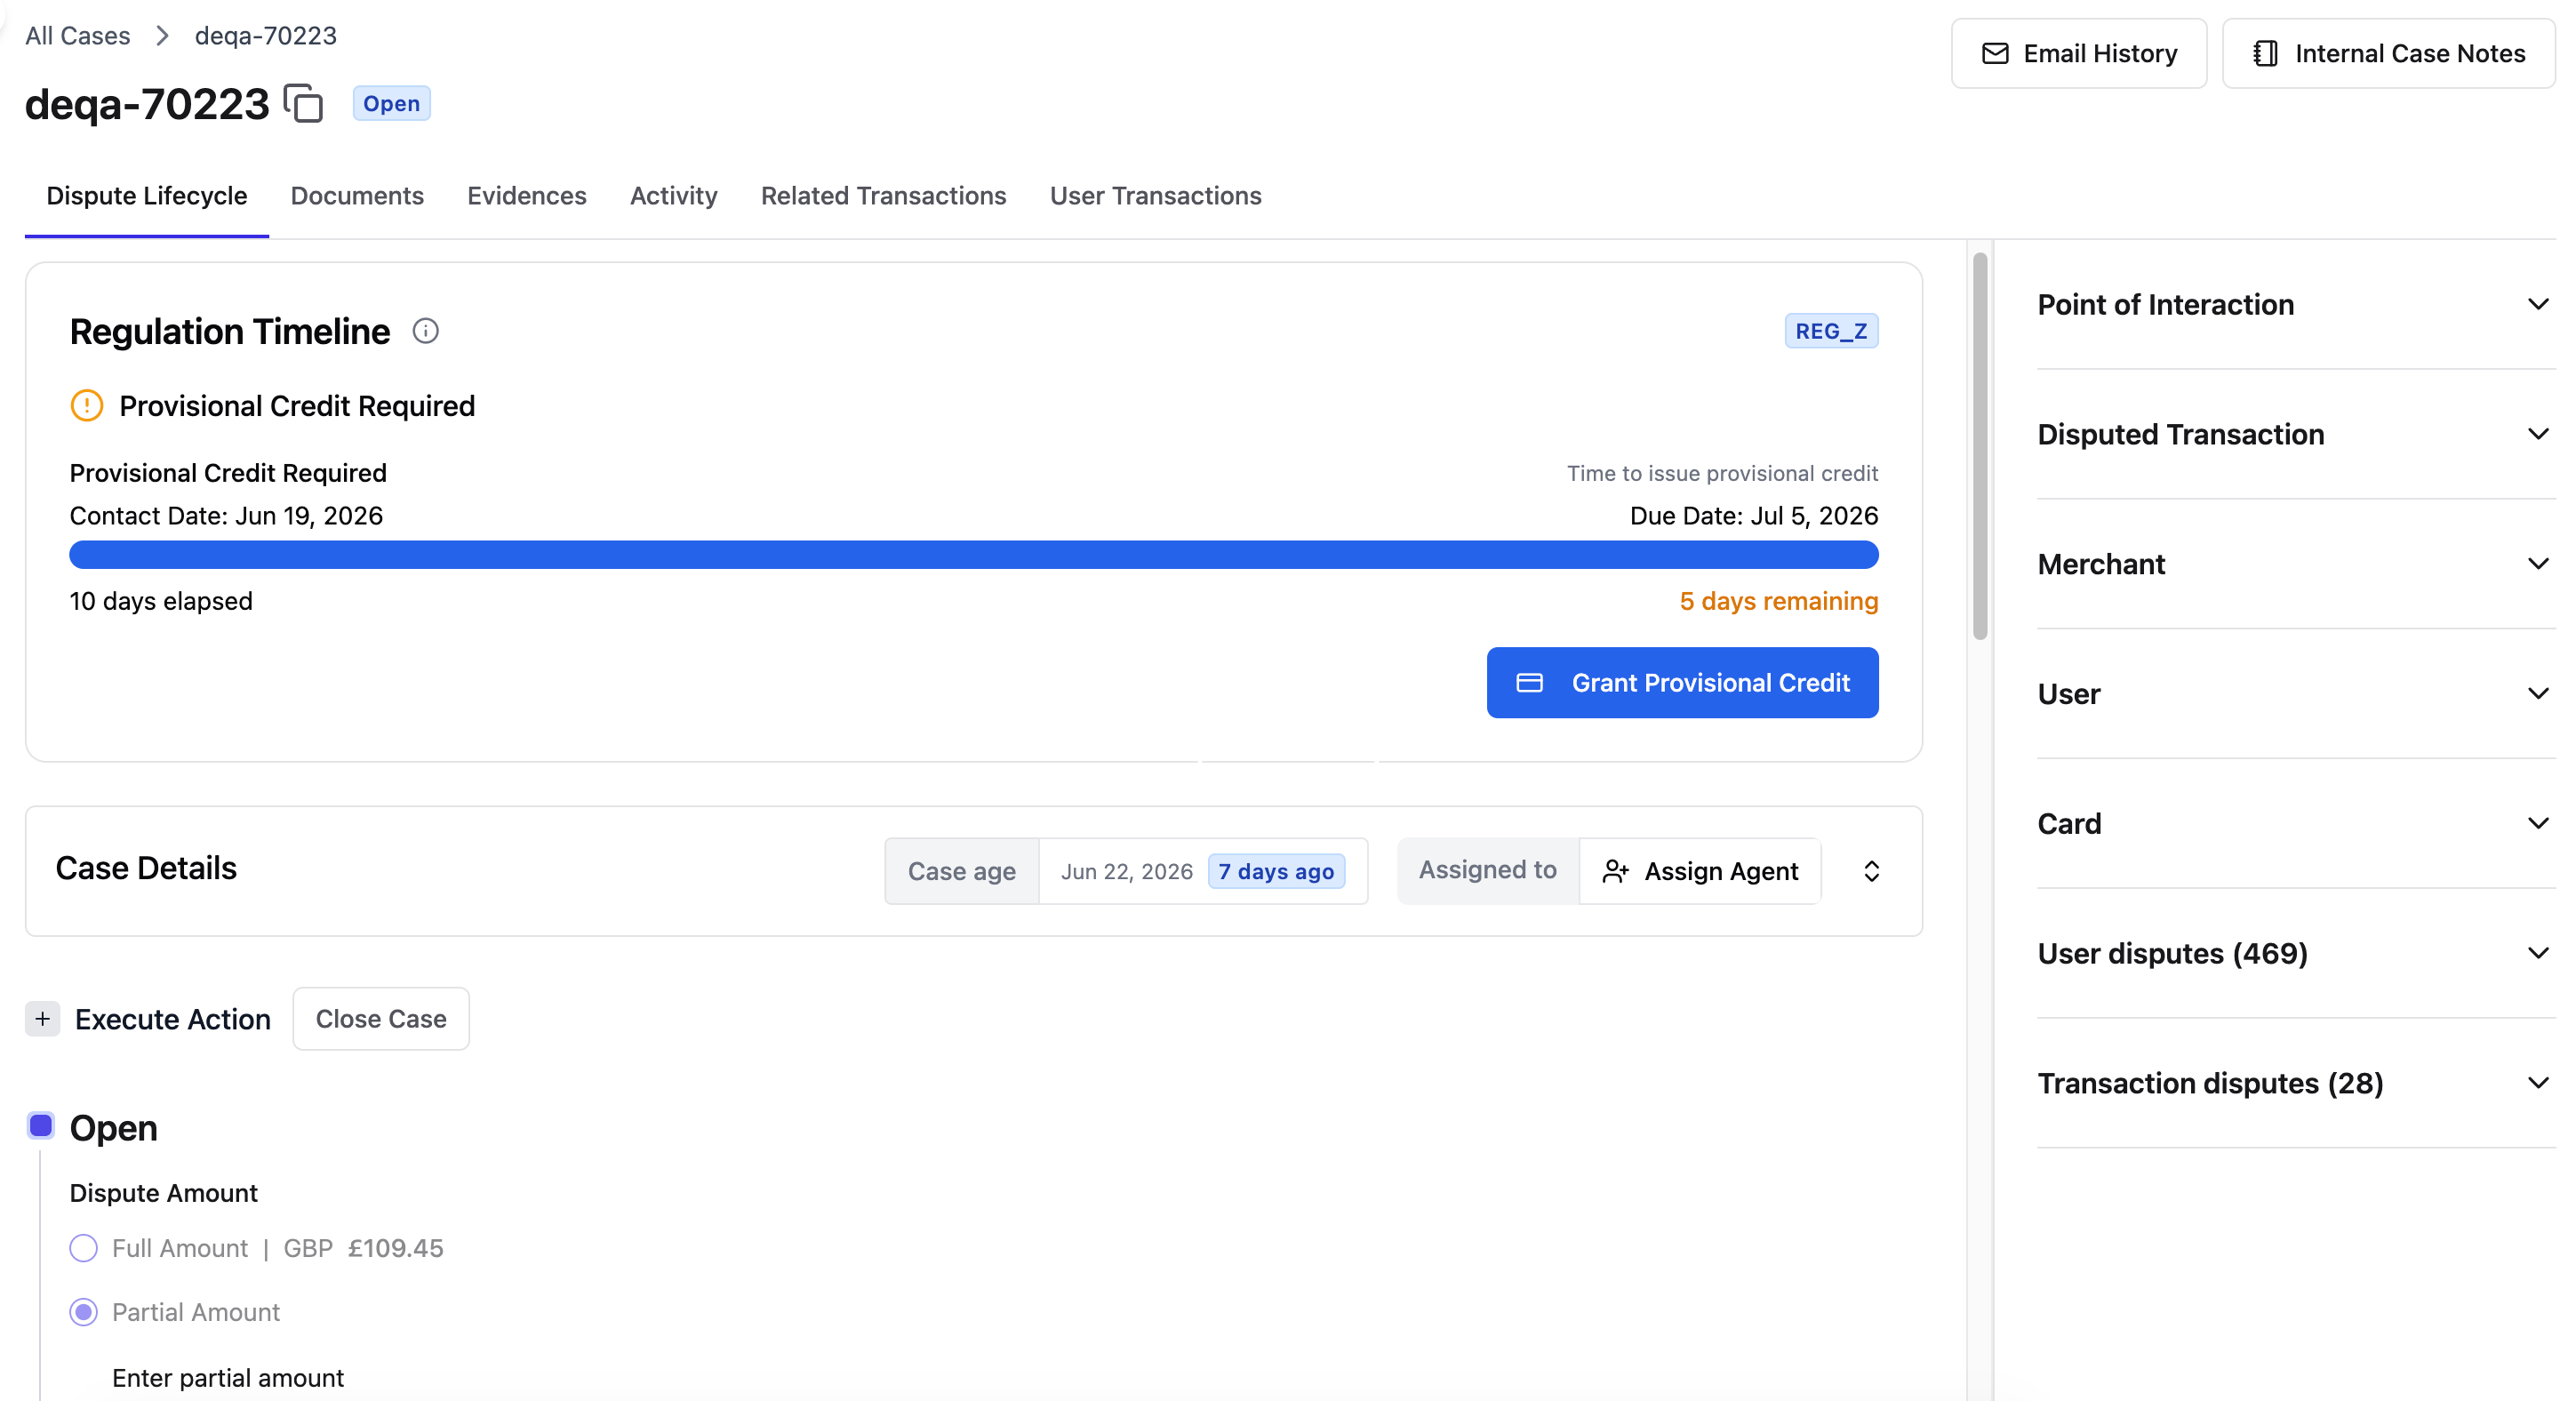
Regulation timeline
The Regulation Timeline on the Dispute Lifecycle tab tracks provisional credit obligations for the case. It shows:- When provisional credit must be issued.
- How long provisional credit has been active.
- When provisional credit becomes permanent.
Case details
The Case Details section on the Dispute Lifecycle tab provides a summary of the case at a glance.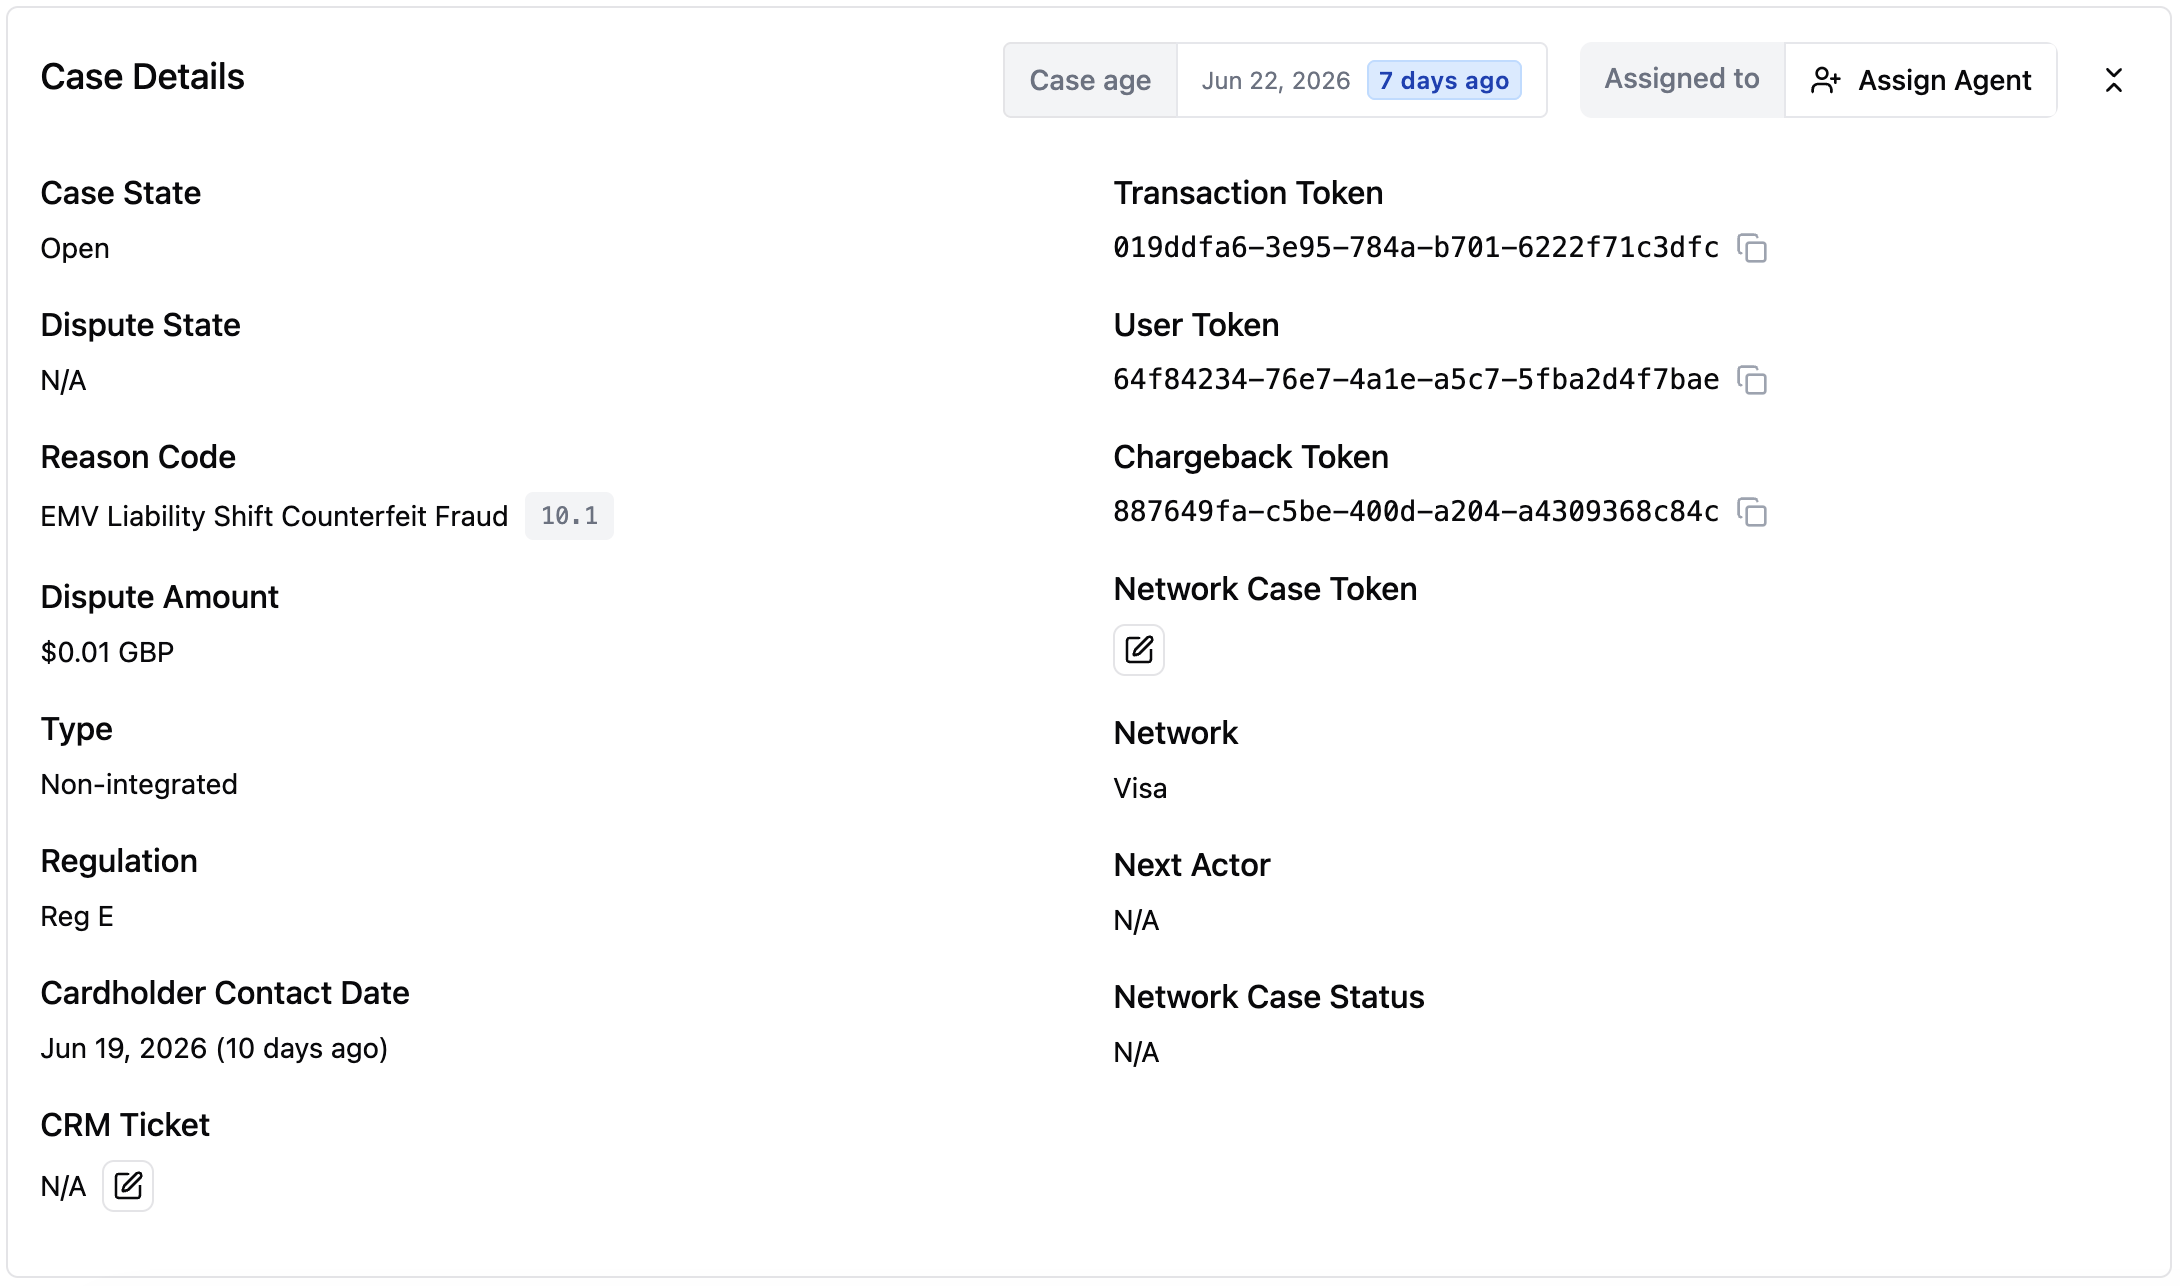
- Current dispute state — Where the case is in the lifecycle.
- Transaction token — The unique identifier for the disputed transaction. Click the copy icon to copy the token to your clipboard.
- Network case number — The card network’s identifier for the case.
- Assigned team member — The person currently responsible for the case.
- Dispute amount — The amount being disputed.
- Dispute reason code — The card network reason code that classifies the dispute.
Documents tab
The Documents tab is where you can upload and review case-related documents from the cardholder, merchant and network.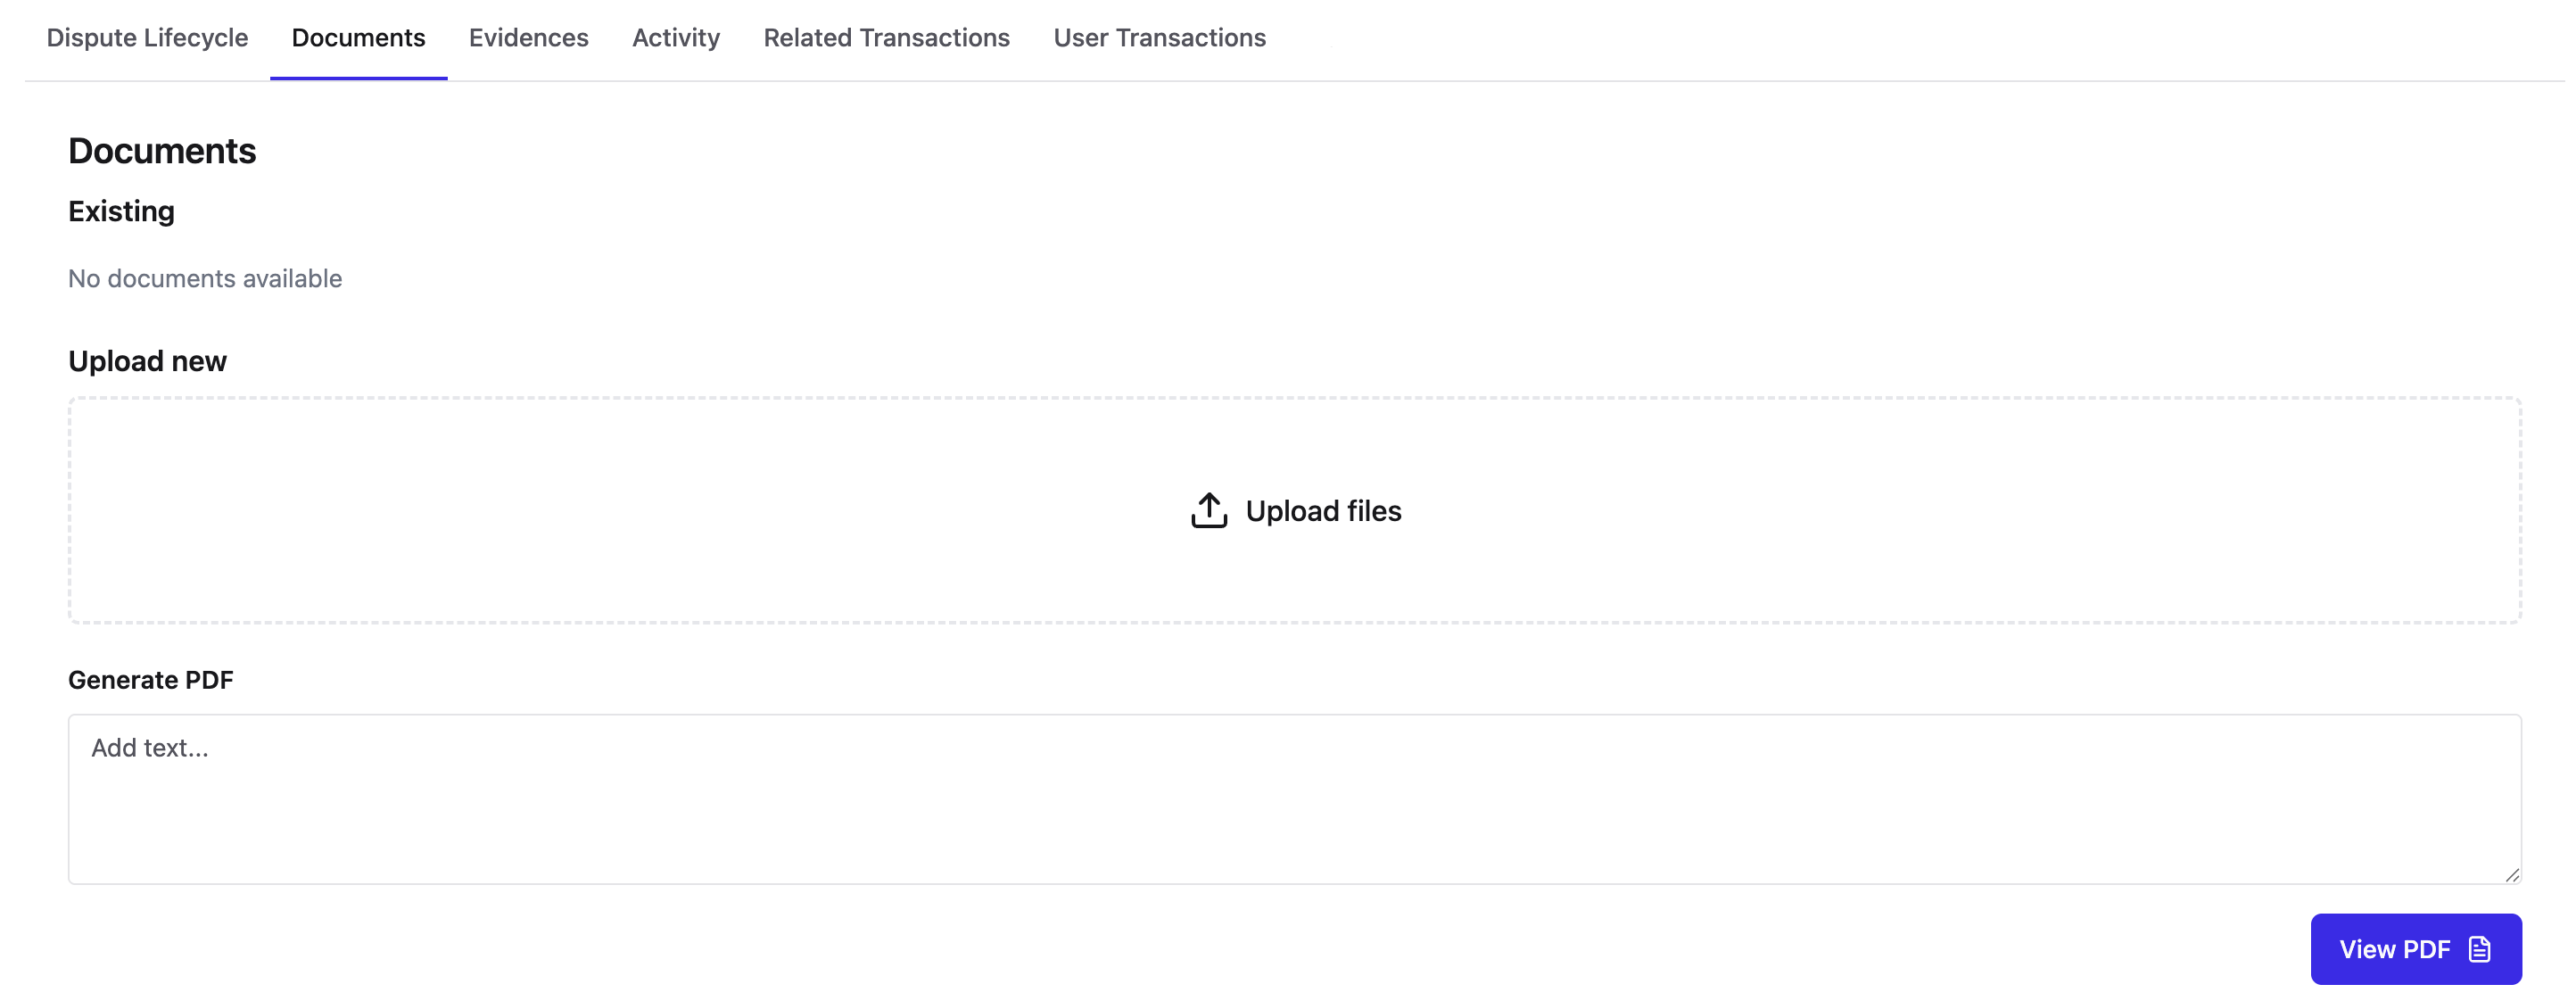
Evidences tab
The Evidences tab is where you upload and manage evidence that you have performed the necessary regulatory milestones related to the disputes case.
Activity tab
The Activity tab shows every action taken on a case, with the most recent action at the top.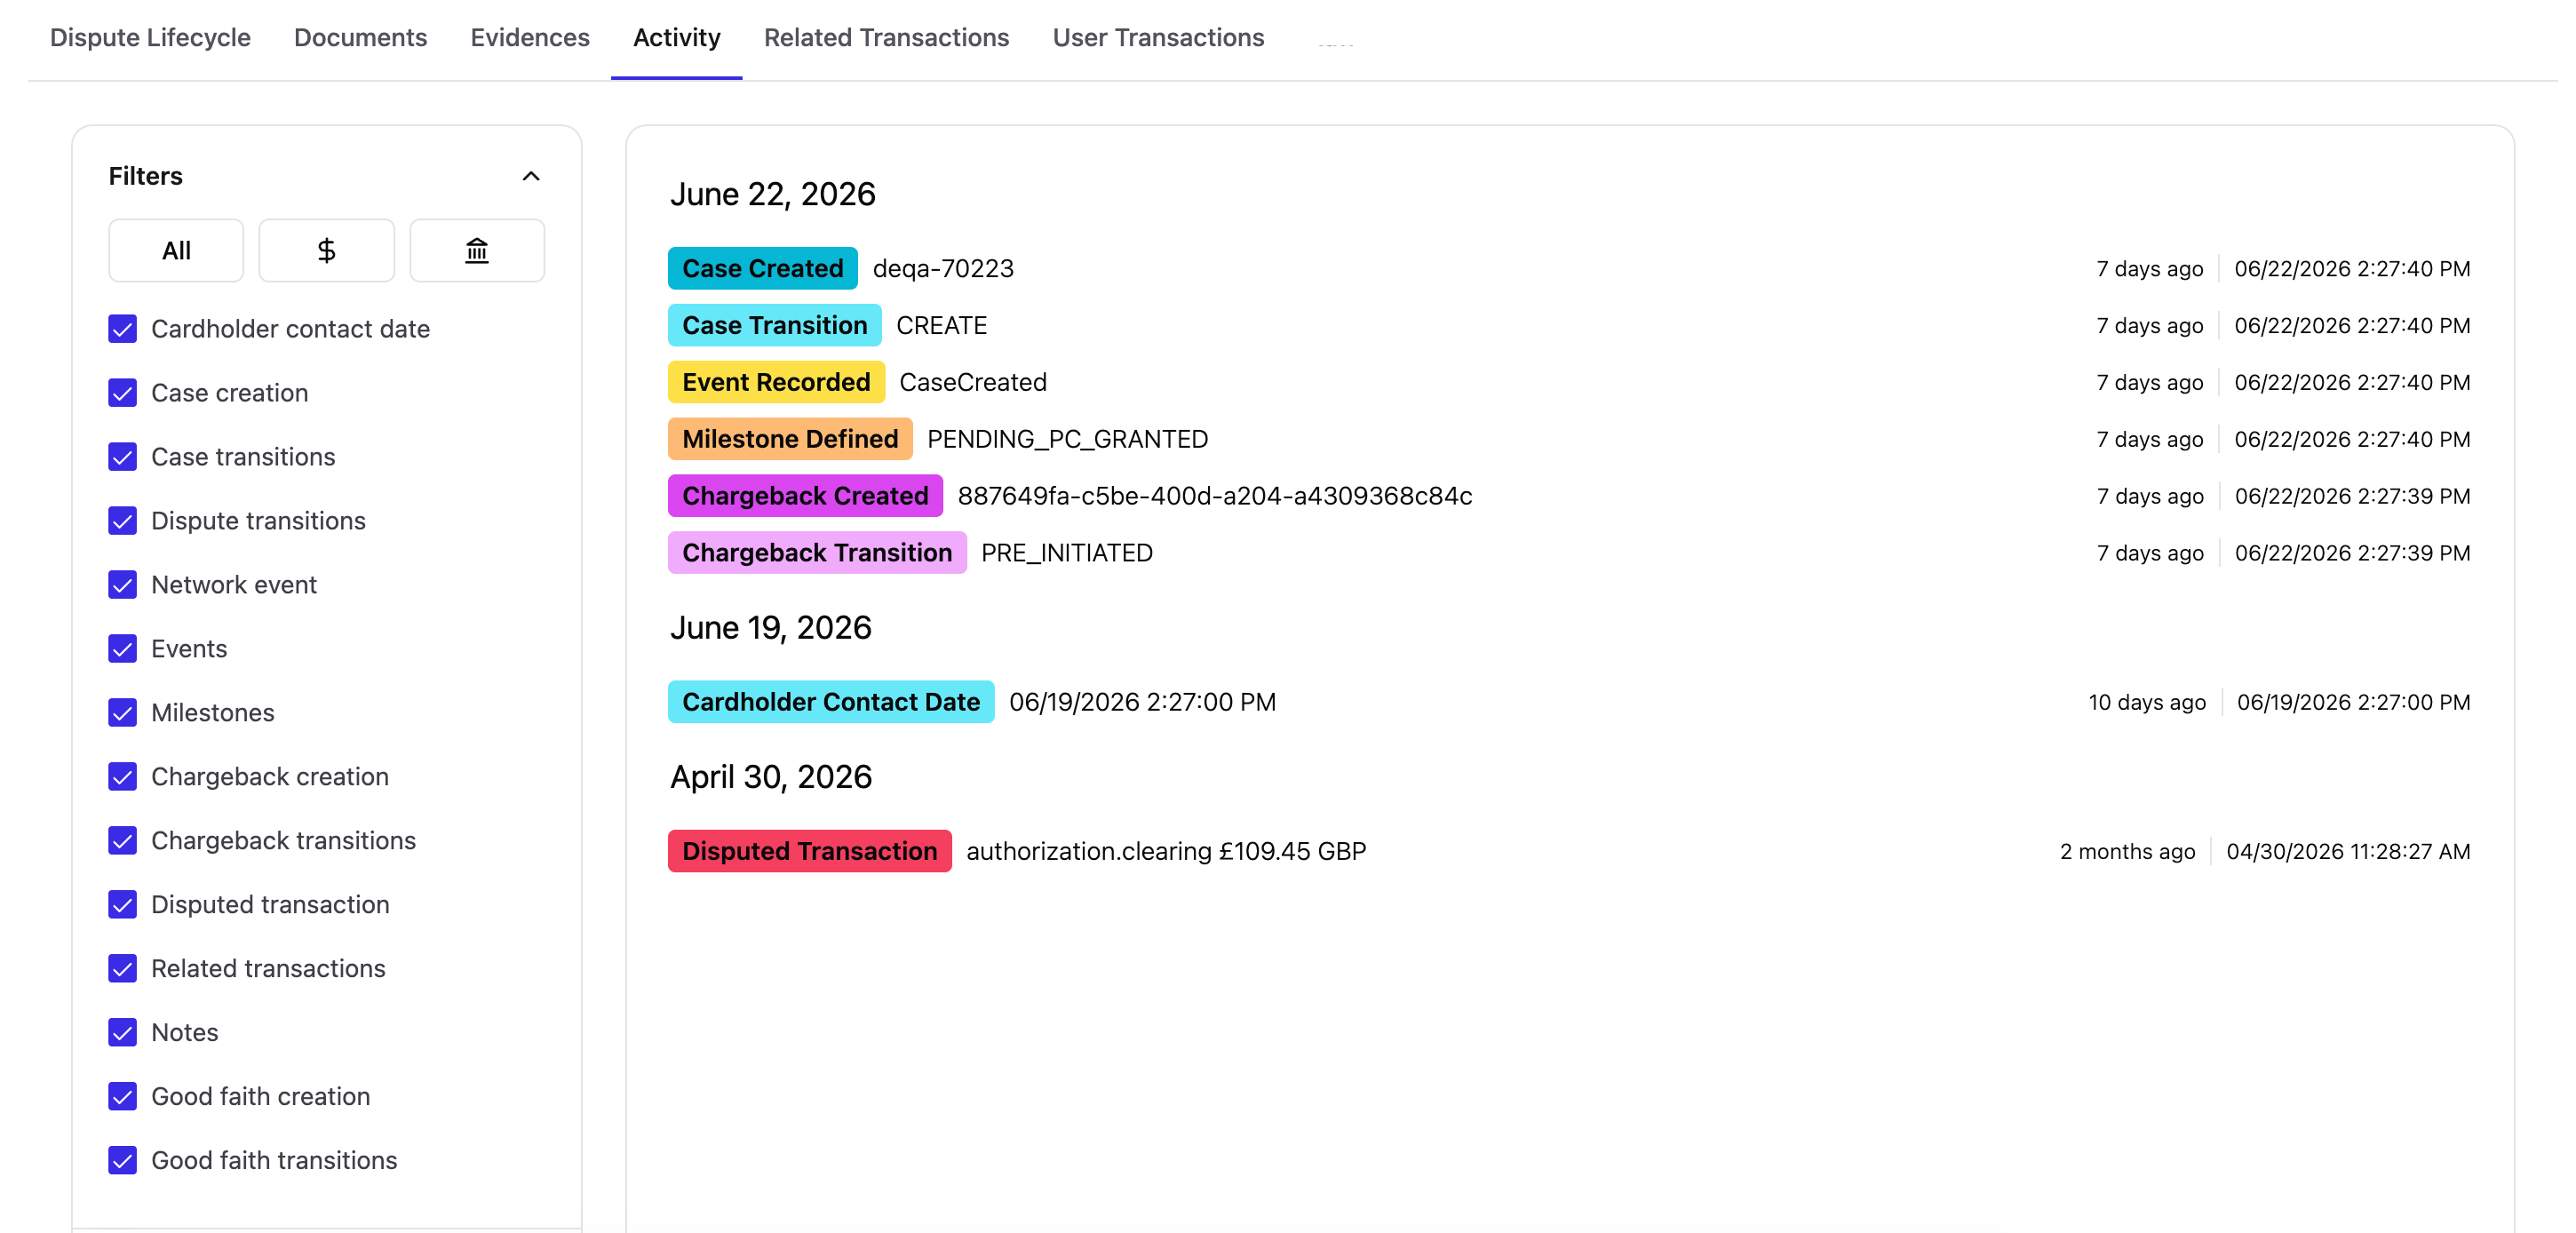
Filtering activity
Use the activity filters to focus on specific types of actions:- Transitions — Case state changes.
- Events — System or external events.
- Milestones — Key regulatory or lifecycle milestones.
- Other — Remaining activity types.
Working with transaction views
The User Transactions tab shows all transactions across all of a user’s cards. The controls help you manage what you see.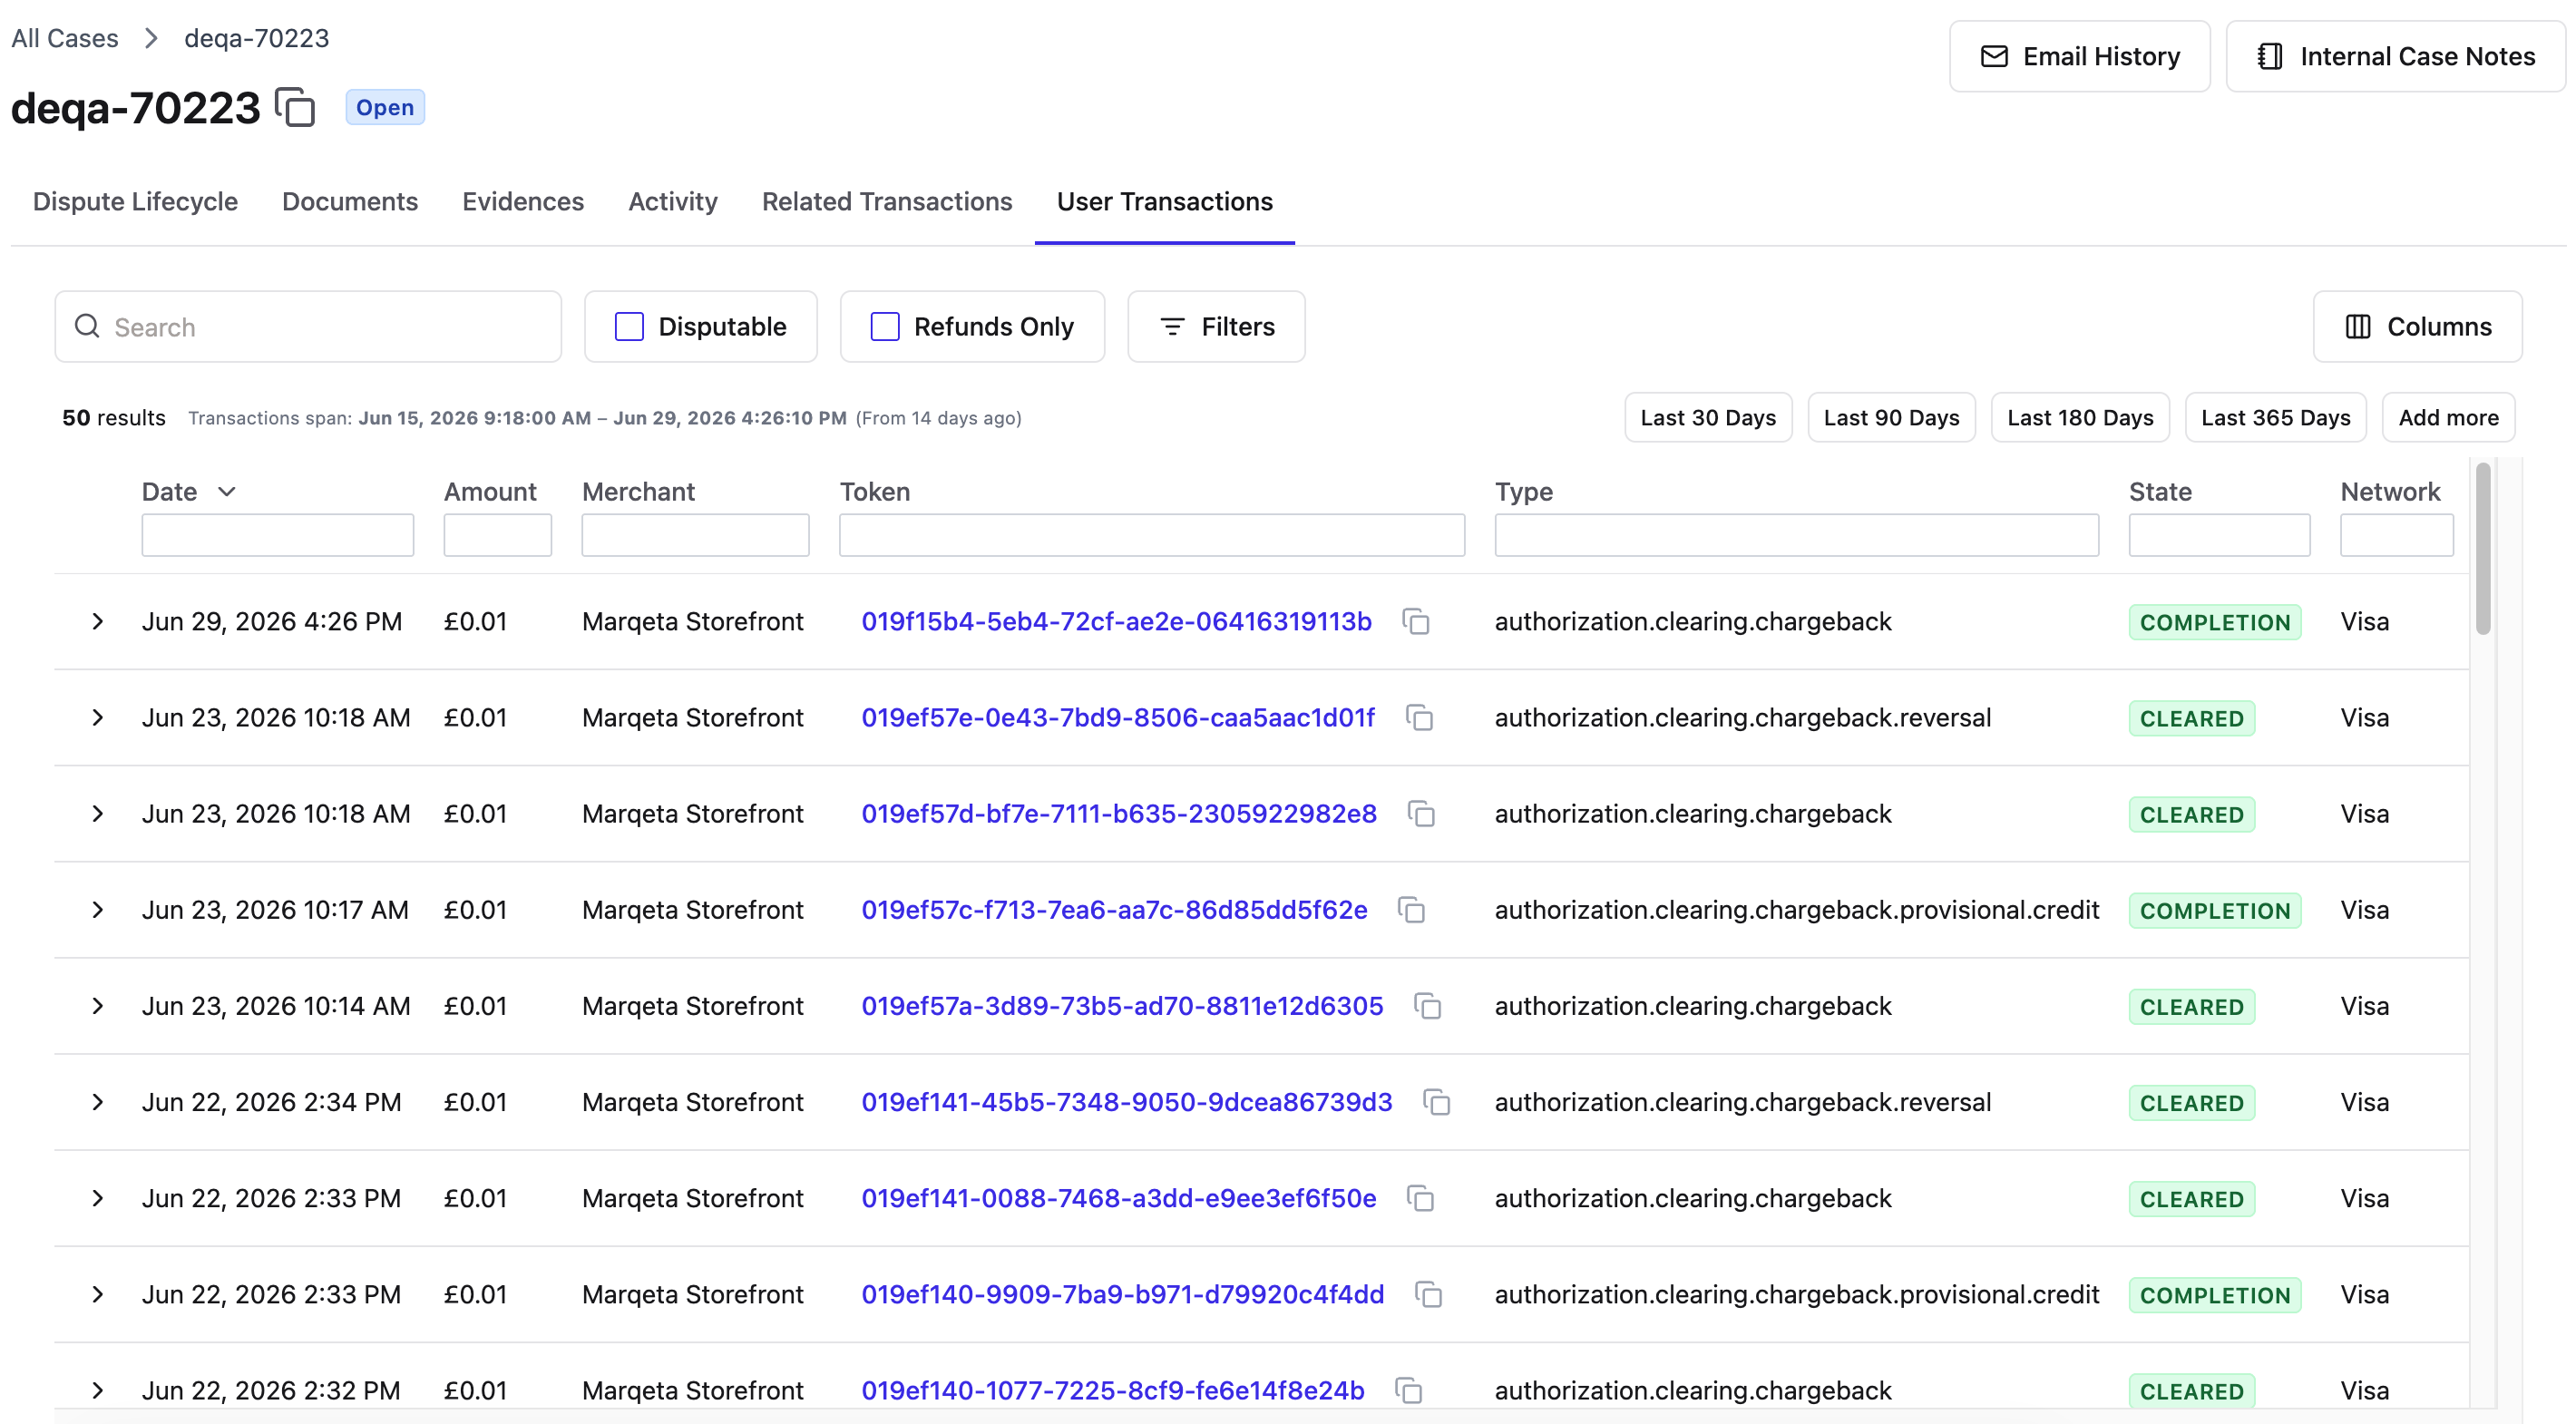
Adjusting how many transactions you see
By default, the User Transactions tab shows the last 50 transactions. You can load more when an investigation calls for it by selecting the option to view additional transactions and choosing the number that fits your needs.Loading more transactions takes longer.
Use the All Transactions option only when you truly need the full history.
Customizing column headers
Select or clear boxes to show or hide columns, and click and drag headers up or down to reorder them. Your preferences are saved automatically.Using quick filters
Quick filters sit between the search bar and the filter icon. You can use them to find the following common transaction types:- Disputable — Show only transactions that can be disputed.
- Refunds only — Show only refund transactions.
Finding specific transactions
You can use the following ways to narrow down transactions within a case:- filtering to a single card.
- using dynamic column filtering.
Searching within a single card
The User Transactions tab spans all of a user’s cards.
You’ll now see only the transactions made with that card.